Your Christmas wish for an overlock sewing machine is coming true: baby lock Victory at a special price!
The festive season is just around the corner – the perfect time to treat yourself or a loved one to a long-cherished wish!
Do you know that feeling? You love achieving professional results, but want a sewing machine that makes overlock sewing easy, quick and without complicated settings? That’s exactly what the baby lock Victory offers.
baby lock Victory: perfect overlock results – without any stress!
We are delighted to announce that this popular Victory overlock machine is now available at an unbeatable special price of £1,195 until 31 December 2025!
The Victory tackles the two biggest challenges of overlocking with flying colours, making them child’s play:
No more adjusting thread tension: Thanks to the unique ATD system (automatic thread delivery), the tedious search for the perfect thread tension is a thing of the past. The machines deliver the exact amount of thread – for a flawless seam, no matter what fabric or thread you use.
Threading with the touch of a button: The innovative Jet Air Threading System makes threading the looper a breeze! Insert the thread, press the lever – and the air pulls the threads into the looper channels as if by magic. You can start sewing straight away!
Whether as a wonderful, long-awaited gift to yourself or as a magical surprise under the Christmas tree for a loved one.
Find out more and experience it for yourself now!
Visit your baby lock dealer to test the Victory in person and see for yourself how user-friendly and powerful it is.
Don’t wait too long – this special price is only available for a limited time and only while stocks last.
Make your sewing dreams come true now!
Share
The baby lock range has grown.
Sewing can now be more comfortable, efficient and creative. These new products are aimed at anyone who wants to take their sewing projects to the next level.
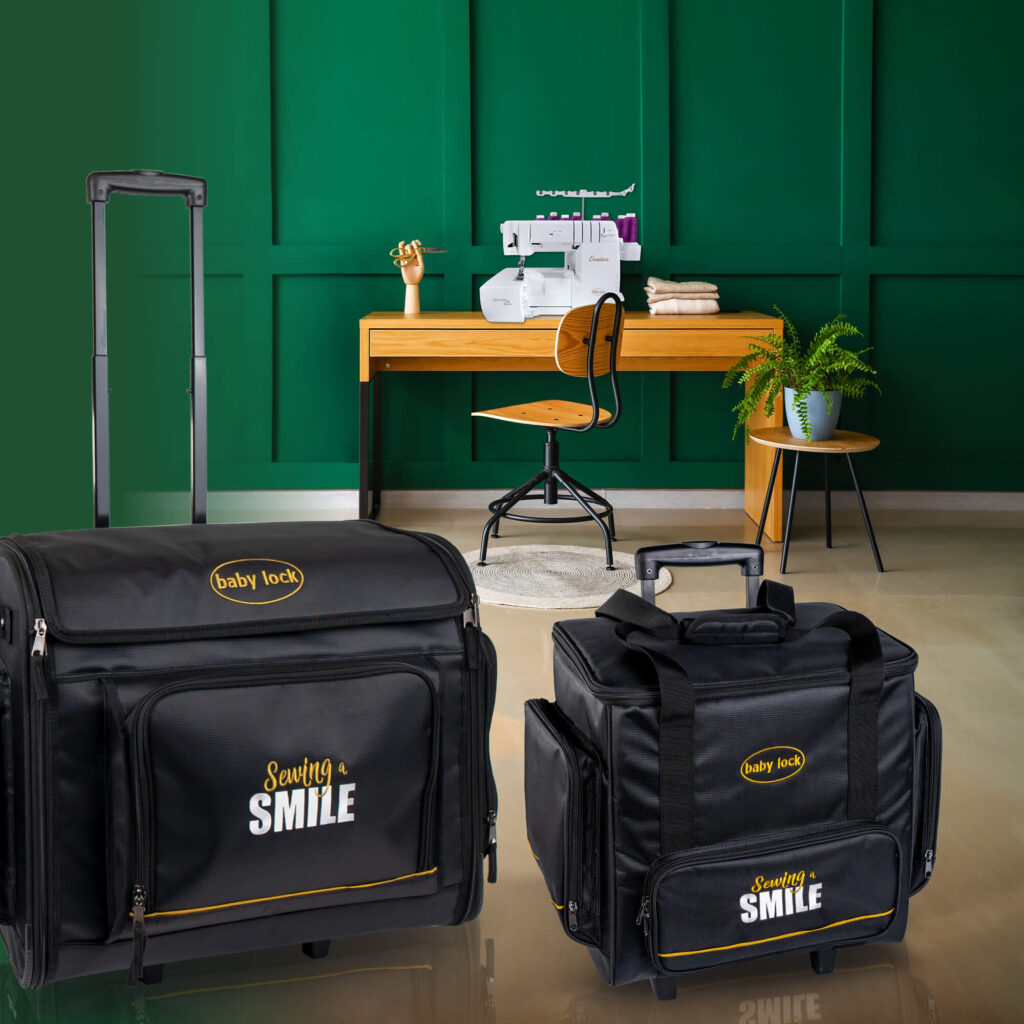
baby lock Trolley
… the mobile companion now also available for ‘small’ baby lock machines
A specially designed trolley for smaller baby lock machines is now available. This lightweight yet sturdy companion allows you to transport your machine safely and conveniently to courses, workshops or meetings. With its numerous interior and exterior compartments, it offers ample storage space for accessories, threads and fabrics. Equipped with wheels, an extendable telescopic handle and side carrying handles, it is easy to handle and store.
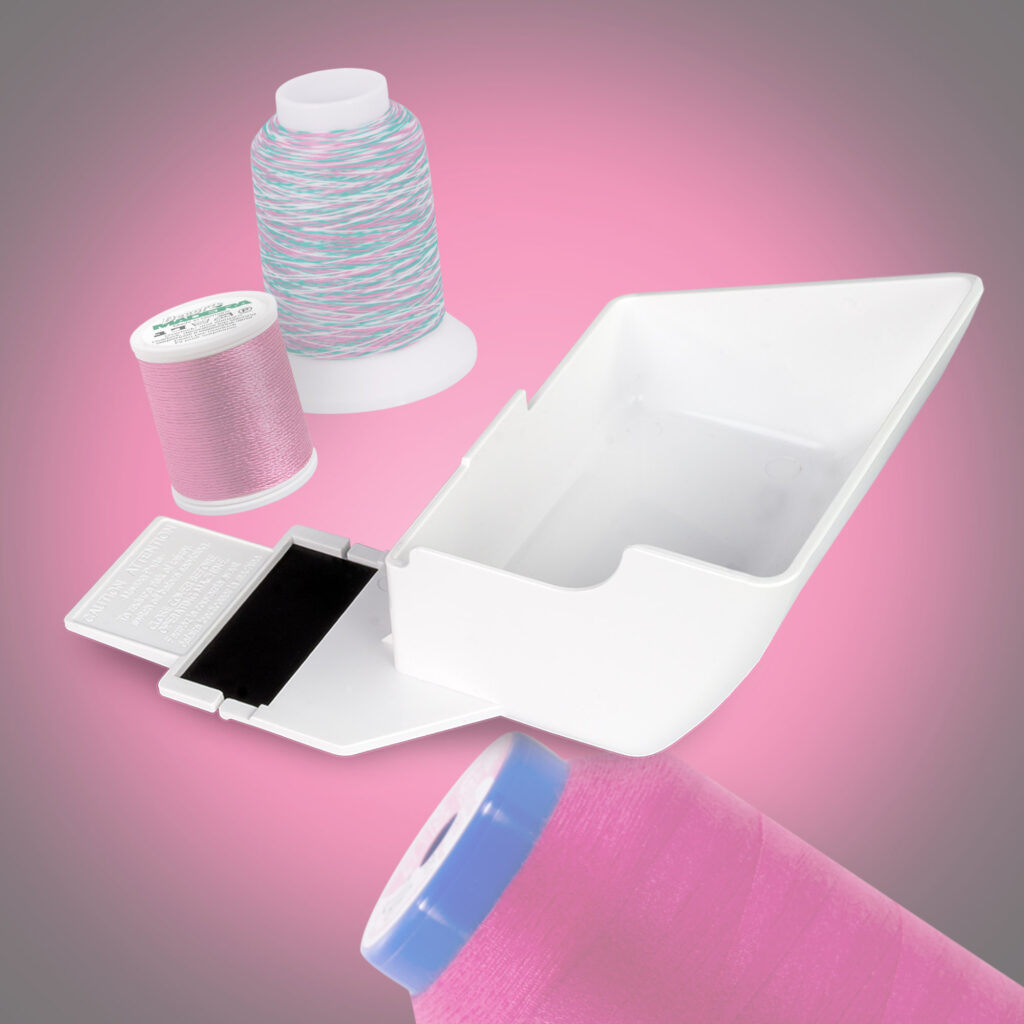
An optimised collection container for greater efficiency
A new development is the collecting tray for thread and fabric scraps, which features an intelligently integrated needle collecting tray. This accessory can be seamlessly connected to the machine and enables an uninterrupted sewing workflow: the tray can remain on the machine while threading the looper, and all adjustment wheels remain accessible at all times. This contributes significantly to the simplification and efficiency of the sewing process.
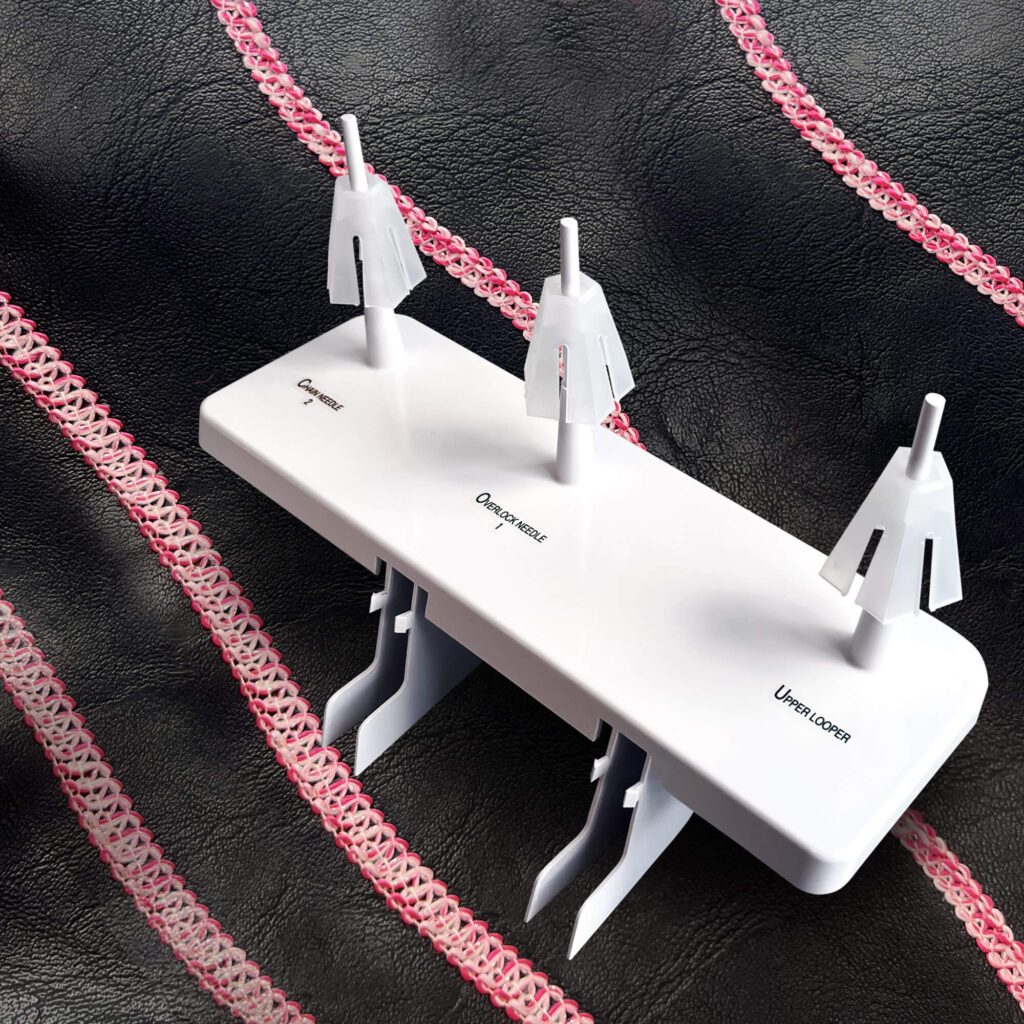
An additional thread stand for Ovation, Gloria and Aspire coverlock machines, as well as Primo and Euphoria cover machines, opens up a whole new dimension of creative sewing possibilities. This clever accessory, which can be easily attached to the machine’s existing thread stand, makes a decisive difference. It allows cover seams to be integrated into sewing projects even more effectively, with greater texture and three-dimensionality. Seams appear more voluminous and accentuated, giving creations a unique depth.
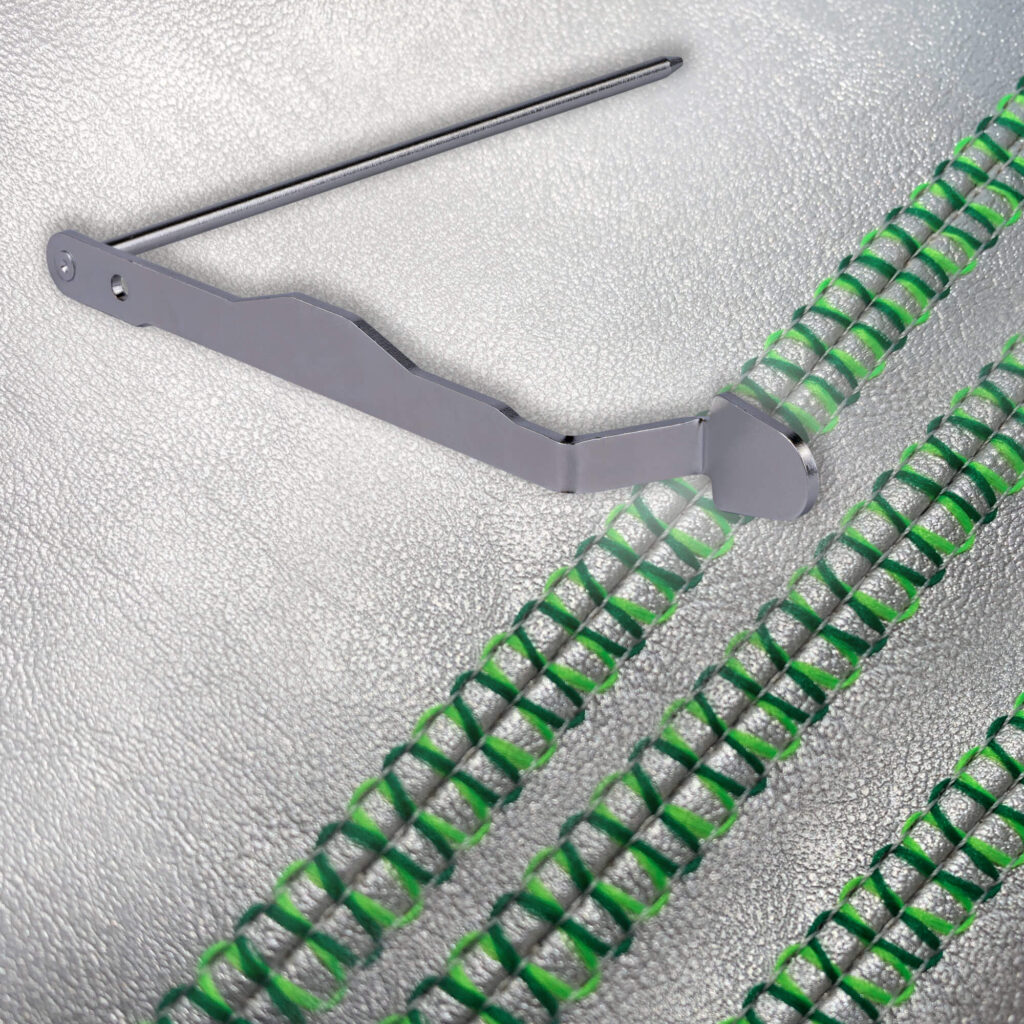
A quilting guide is available for precise sewing, especially in seam shadows. The front part of the guide has been designed to press precisely onto the seam line, providing optimal orientation. This makes it easy to achieve straight and clean seams. In addition, this versatile sewing foot allows you to sew at regular intervals – whether from the hem edge or between individual decorative stitches. Precise intervals of up to approximately 7 cm from the centre needle can be maintained.
Hi, I’m Jan! With years of experience in the sewing world, I’m all about baby lock machines, clever hacks, and fun projects that make sewing a joy. Whether you’re new to stitching or have been at it for years, I’m here to inspire and share a few tips along the way.
Sewing holiday, unabridged!!
OK, I know that I work in the sewing industry.
Sad individual that I am (or maybe LUCKY), I happen to love going on sewing holiday with my sewing buddies!
Around 10 of us like to rent a large house twice a year, laydees of a certain age prefer a room to themselves, plus, if poss, a bathroom! This makes it quite difficult to find just the right venue. However, this spring’s choice was a repeat, situated in Shropshire, and well known to us. We have a rota for cooking meals, one for desserts, and always a willing volunteer at gin o’clock…..usually 4.30; depending on whether projects have gone well, or failed miserably!
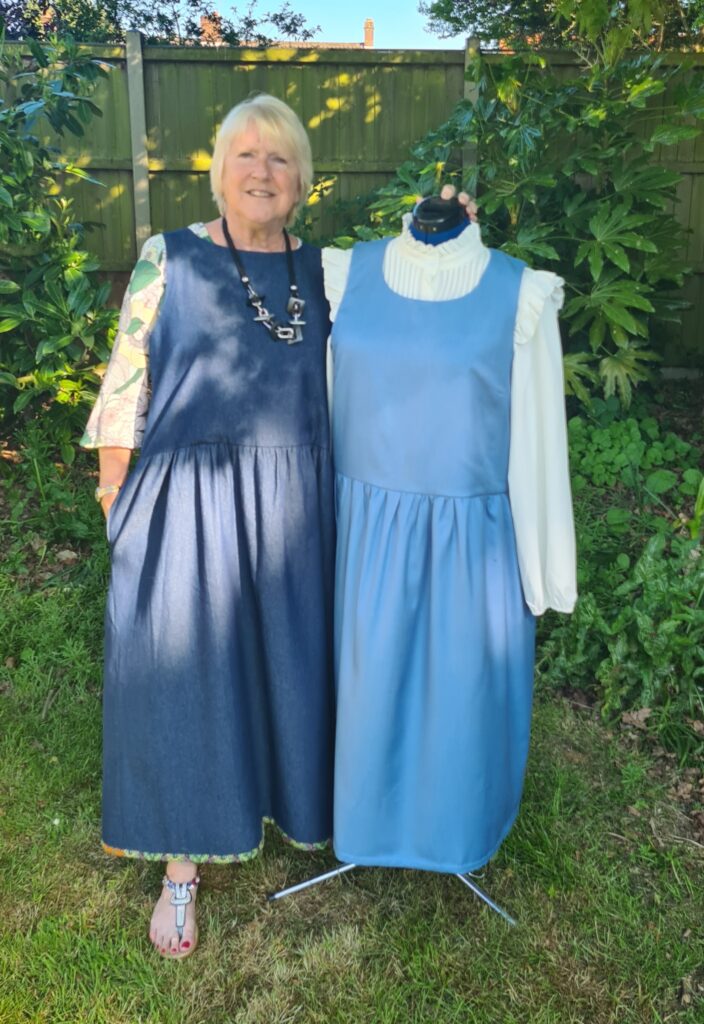
My remit for the week (Having first discarded most of the TEN projects that I initially selected), was to produce a pinafore dress, as this was a garment that I didn’t possess. I found a great pattern from Tessuti; the Felicia Pinafore Dress. To this end, I was to use the beyootiful cashmere and wool mix that I had been saving for ‘best’.
Anyone else do what I do? Buy some gorgeous fabric, then not use it due to shortage of time, failure to make a toile, or sheer fear! Because I had a whole seven days, I felt confident that I could do a toile and the ‘real thing’. My stash is swelling with the good stuff, while cheap fabrics for toiles are disappearing fast. (I never use calico, as I wouldn’t wear it. I prefer to use a similar fabric to that planned)
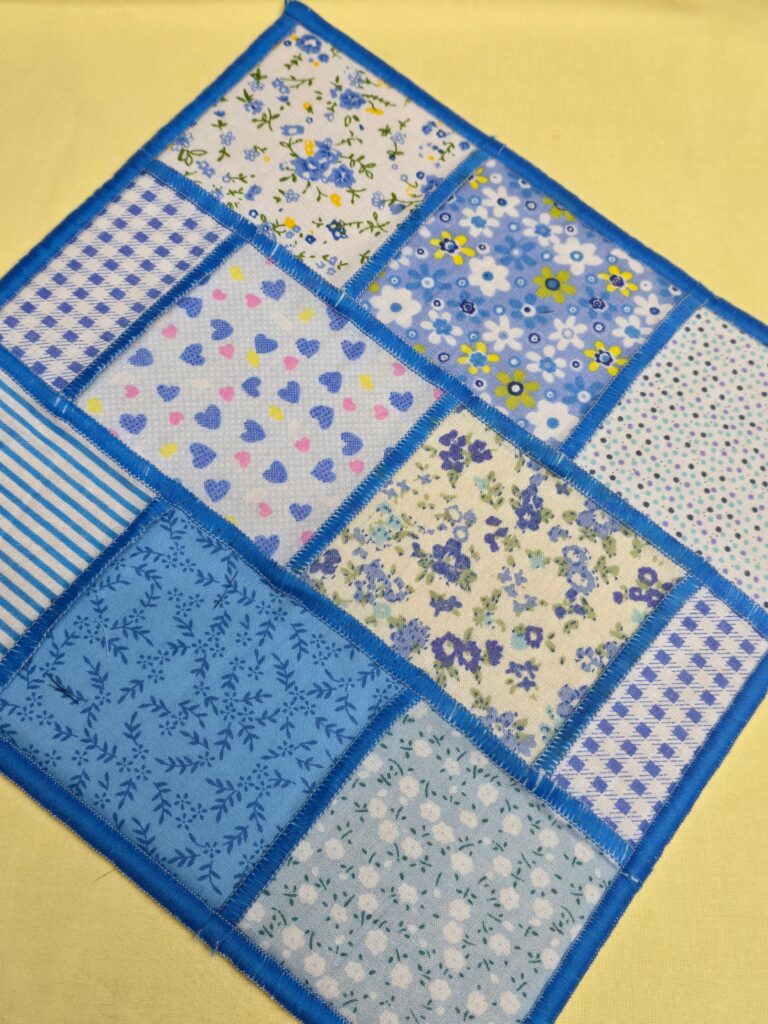
First inspection of the pattern showed rather a lot of facings and interfacings. Couldn’t be bothered with that, so I decided to make TWO bodices, and do the dreaded ‘bagging out’; only to discover that I didn’t have sufficient of my cheap denim for that. One of the lovely ladies came to my rescue, with an exciting bin bag of ‘excess material’(!!!). I chose a gorgeous busy cotton in bright colours.
My weapon of choice was the baby lock Evolution. Now discontinued, it is a similar size to the new Aspire, and weighs less than the Ovation or Gloria for travel. It has the option of the industry favourite stitch; the 5 thread safety seam. As I would be using woven fabrics for both toile and the real thing, this was a good strong choice. My trusty Pfaff Performance 5.2 was there for the extras.
So, denim and donated cotton cut, darts stitched, I joined both shoulder seams. (All pictures show the good fabric!)
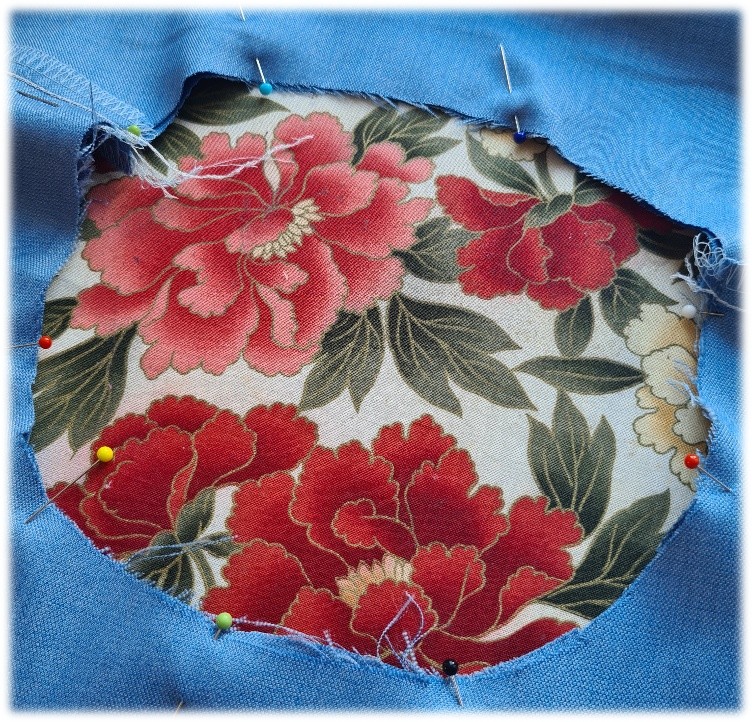
Next was to join the lining and main layers at the neckline. Then trick to doing this with two different fabrics is to put the lightest one underneath, as your feed dogs will generally keep it under control. Even when using an overlock and chain stitch, it is still necessary to snip the seams; enabling the seam to spread once turned the right way out. Just remember not to snip beyond the last line of stitching!!!!
SNIPS OR NOTCHES? Snips when you’re sewing the inside of a circle to turn outwards. Notches if you sew the OUTSIDE of a circle to turn inwards!
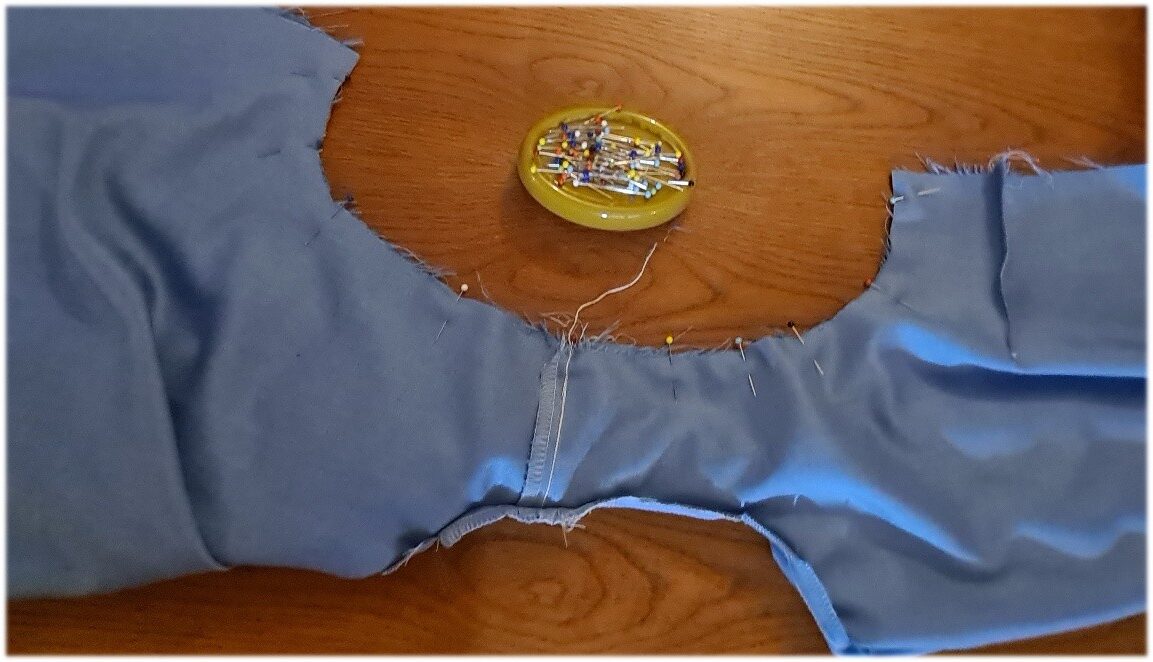
Now for the fun part…..BAGGING OUT! This requires a degree of common sense which, apparently, I don’t possess. I knew the theory, I’d done it before. Firstly, the armholes: main fabric joined to lining fabric, right sides together. Sounds logical and straightforward, doesn’t it? Not on that day, and I promise no G&T had passed my lips!
First, I made a sausage. For some inexplicable reason, I joined both main fabrics, thereby totally closing the armhole.
A fair amount of hysterics ensued, with a few eager volunteers arriving to also scratch their heads in puzzlement. We twisted and turned it, poked and prodded. The committee vote was to baste first, which I then did after giving myself a damn good talking to……..
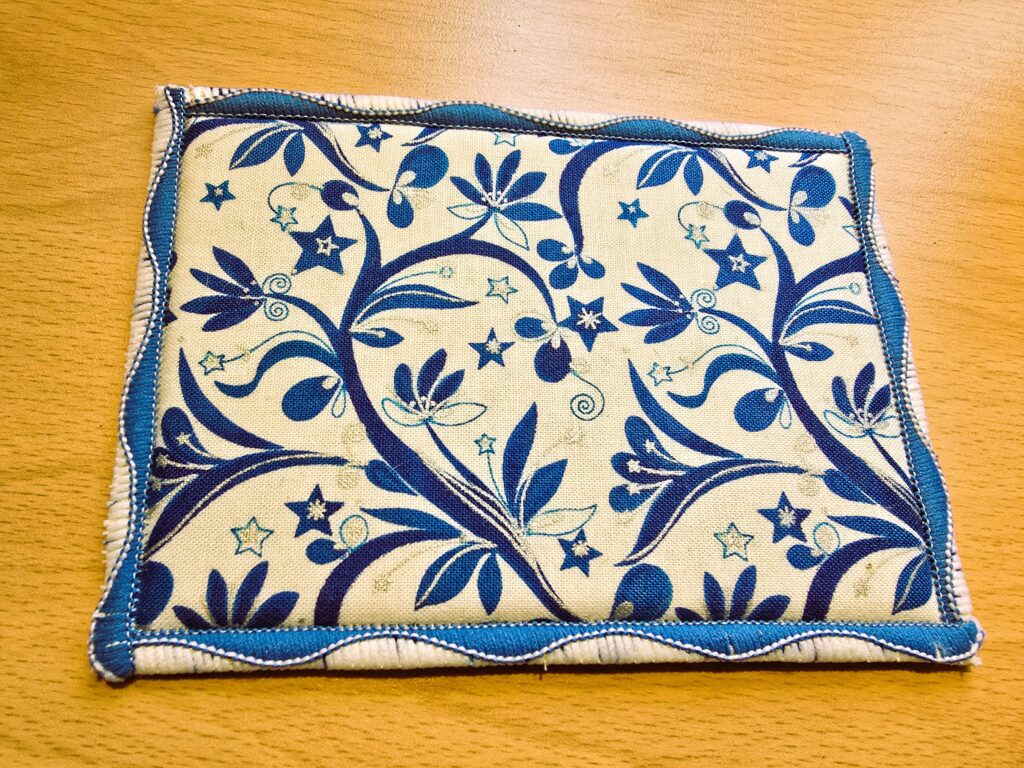
Corrected technique shown in the photo. The opposite side is rolled and inside; between armhole and neckline.
Simples!!!
I believe this was the day that gin o’clock arrived early…..🍸🍸🍸🍸
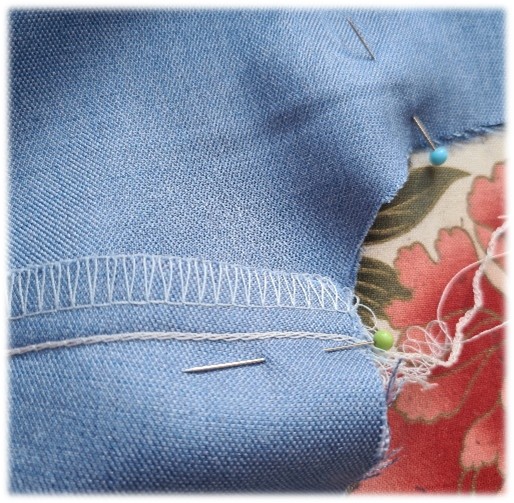
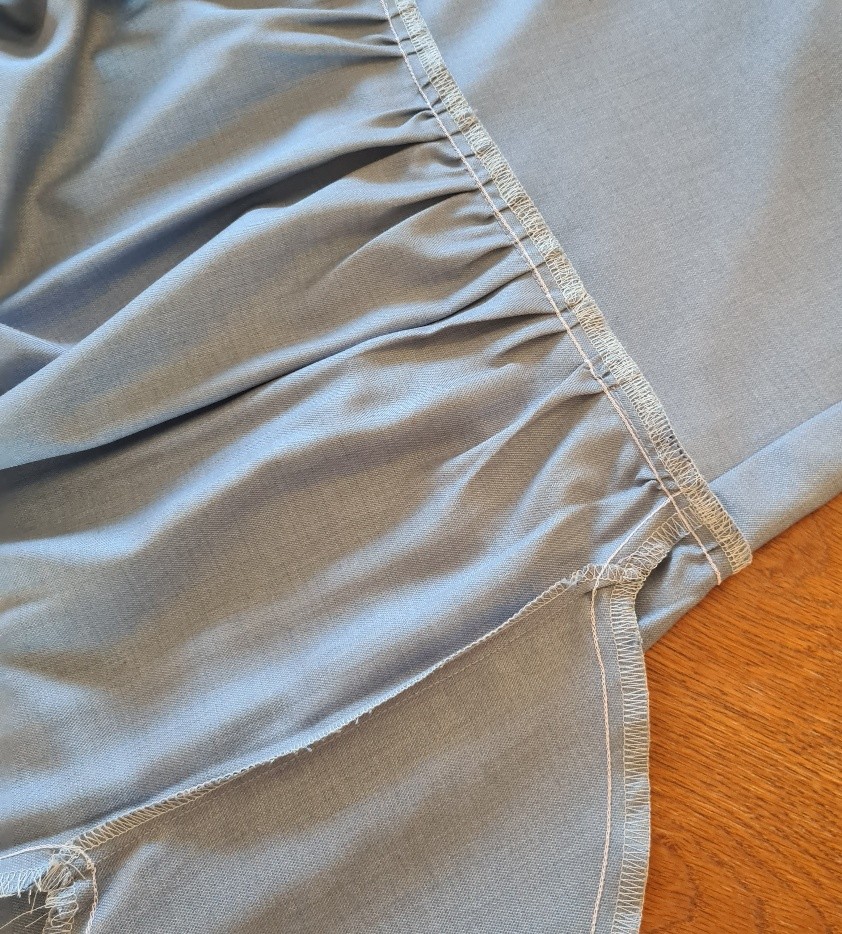
Once the devil’s armholes were completed, the rest was simple in comparison. Side seams as pictured, showing the chain stitch for strength alongside the 3 thread overlock for a beautifully neat finish.
NOTE: I found that using needle C1 plus a wide overlock gave me a 5/8” seam.
ANOTHER NOTE: I have recently seen posts about chain stitch unravelling. Do not EVER turn the balance wheel backwards, and your cover stitch or chain stitch will not unravel!
Skirt Sewing & Construction!
Next came the skirt…pockets first, stitched onto each side, under stitched on the sewing machine, then join the side skirt seams including pockets.
NOTE: Over the years, several people have complained to me that when stitching such a seam with pockets, their steering has slipped, resulting in an accidental slice into the fabric. DO NOT STITCH FROM TOP TO BOTTOM! Start at the hemline. Any (gin and tonic induced?) slippage will occur in the pocket, not into the skirt!
Now, those of us who proudly own a quality overlocker or combination machine have the ability to gather fabric evenly using the fabulously misunderstood Differential Feed. In this instance, I measured the bodice, and the skirt widths, discovering that the skirt was roughly 1.5 times bigger than the bodice. I tested a 10” strip of the main fabric, with settings at DF 1.5 and stitch length 4. This test drive came out just as I wanted: my 10” strip was 6.5”… almost exactly 2/3 of the original.
NOTE; NEVER assume that you’ll get the result you want. Every fabric will behave differently. Always do a test run!
When gathering a skirt to a bodice, each one of which is a complete circle, be sure to leave an overlock chain at each end. Then, if your fit isn’t quite accurate, you can pull the needle threads to gather a bit more.
NOTE: overlock stitches are waaaaaayyyy easier to gather than those on a sewing machine! I use a 4 thread overlock stitch to achieve ease stitching at the top of a sleeve head. Beats snapping the lockstitch thread repeatedly, without having to resort to the dreaded hand sewing!
Because the pale blue fabric was such a luxury, I opted for a hand sewn hem!!!!!
Anyone who knows me, will understand that actually sewing things with one of them there little sharp things is a bit of a no-no! However, I dutifully gave it my all; together with a fingerful of blood and some choice words. You won’t see photos of that, though. It wasn’t my best achievement!
All things considered, I think I will get a lot of mileage from these two dresses. I’m at an age where I repeatedly need to remind myself that the days of a bare midriff, pencil skirt, hot pants (some of you won’t have a clue what they are!) or, in modern parlance, bodycon, are long gone….as is my size 8 body.
I’m at that stage that I can – and will – wear anything I darn well please without fear of side eye glances; and it’s wonderful!
Till next time,
Keep calm and keep stitching, Jan 😄✂️🪡
Share
“Sewing Stories & Advice with Jan” ❤️🪡
Hello, I’m Jan! After years in the sewing industry, I’ve learned a thing or two about tricky stitches and creative projects. I love showing what baby lock machines can do—grab your thread and let’s turn your ideas into something amazing!
WOOLLY NYLON IS AWESOME!
For many years, we in Great Britain were forced to look on in envy as our American cousins praised the virtues of their woolly nylon. “Fabulous for covering pokies in rolled hems!” they cried. “Ideal for children’s clothes, or chub rub!” they boasted.
I, for one, was more than a tad jealous. The only equivalent to be found here was the leftovers from industry, only to be discovered on market stalls or those damp and dark mill sales.
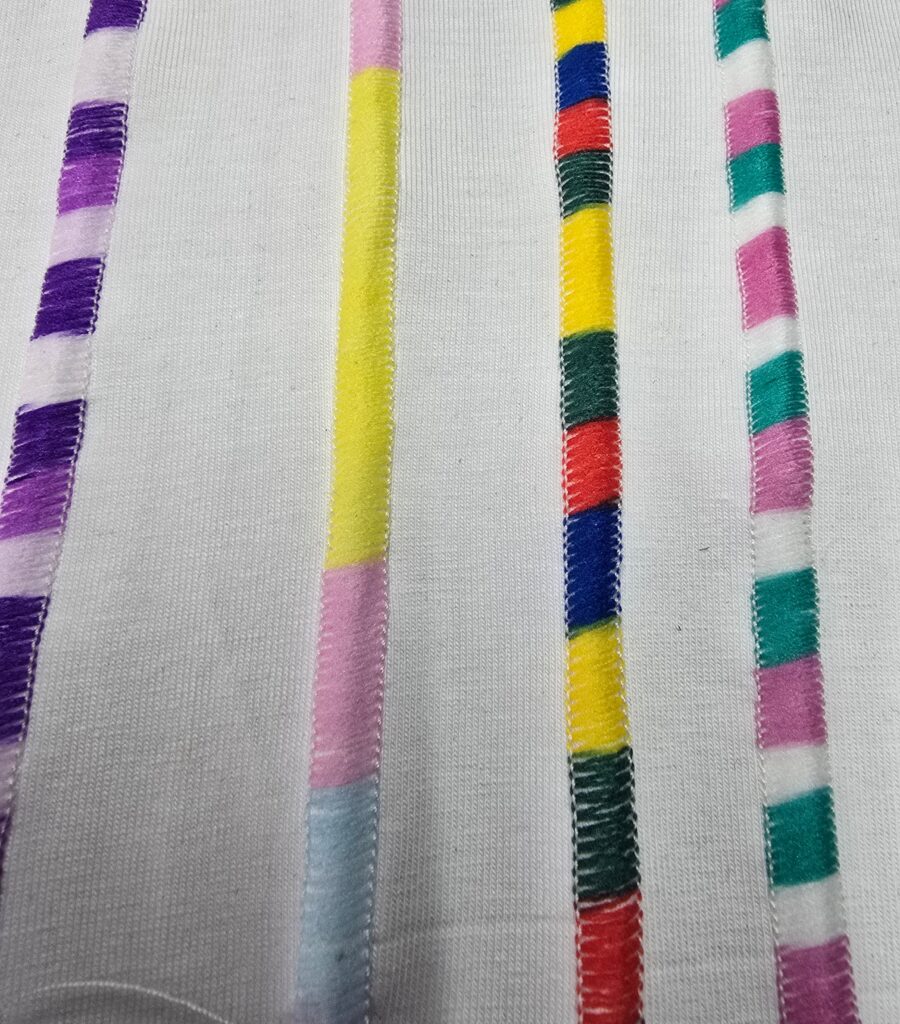
Then one glorious day, baby lock Japan took note. They sourced a quality thread, ideal for all overlockers, in a spectacular range of colours and finishes. baby lock’s Woolly Lock was born. Yours truly was addicted! “I’m officially hooked—here are 4 reasons these threads are irresistible!” ❤️✂️
The different finishes are as follows:
Standard in a wonderful range of colours for every project. I inevitably use this for all of the garments made for my grandchildren, as it creates an incredibly soft seam without chafing.
Metallic – the core woolly lock is wrapped in either silver or gold foil. If you love bling (who doesn’t?) then this is for your shopping list!
Variegated– in a multitude of shades, the variegated threads add a big POP to seams and decorative stitching
Extra! – Woolly Lock Extra is an extra thick version, specifically created for the Wave Stitch exclusive to certain models, but also brilliant on a three thread edge stitch.
Things to note: When threading your jet air threading baby lock, the puff of air will blast straight through the woolly texture of the thread. Therefore, you will need to use a THREAD CRADLE.
Do not be tempted to tie a knot and pull it through! This, if the knot gives way part way through the tube, can cause a real blockage.
To use a thread cradle: Take a long length of normal overlock thread ( maybe 60” or 150cms), fold it in half, and, whilst holding the loop end, put both cut ends into the threading port and whoosh it through. Now insert the end of the Woolly Lock into the loop and pull everything through to the business end!
When using ANY thicker thread in the loopers, always start with a long stitch length. This will prevent the fatter stitches crowding together. Slowly reduce the length until the stitch looks good.
I found that the Woolly Lock, because it has some stretch, may pull in the fabric if it is very lightweight. A washable double sided sticky tape proved enough to stabilise the edge and prevent this.
Thanks for reading! Until next time, keep those machines running and your creativity flowing.
🎉 “Stitch, smile, repeat.” 😄🧵
Share
Hi! I’m Alison from Instagram & YouTube. I’m a sewist, vlogger and Brand Ambassador for baby lock UK.
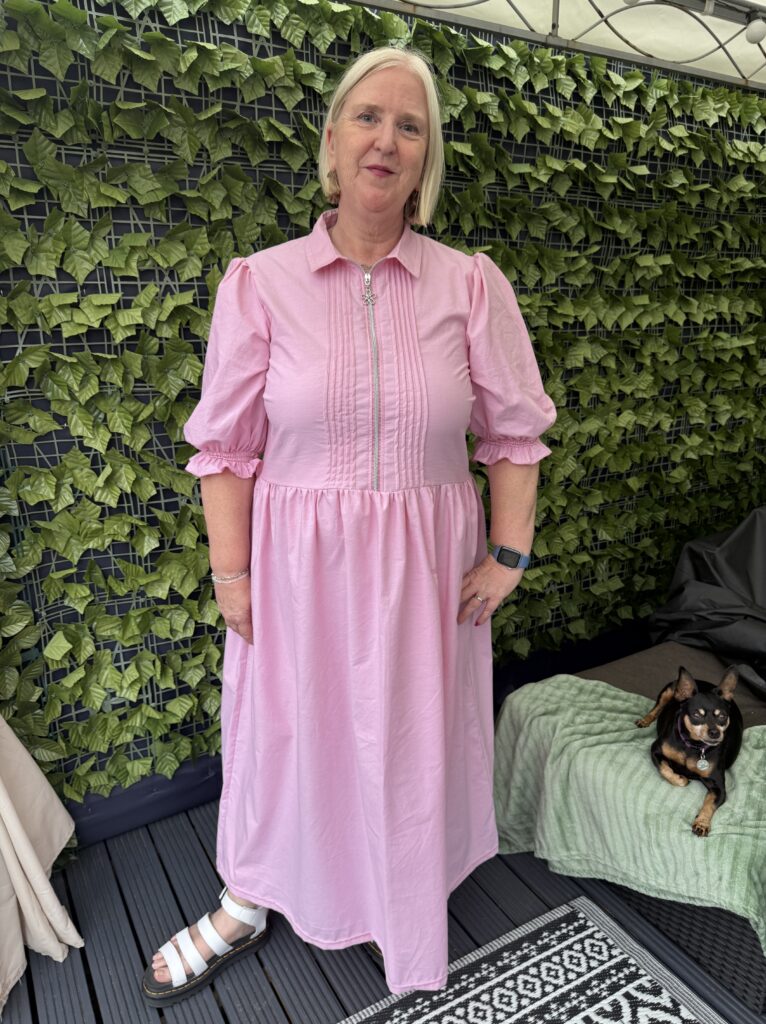
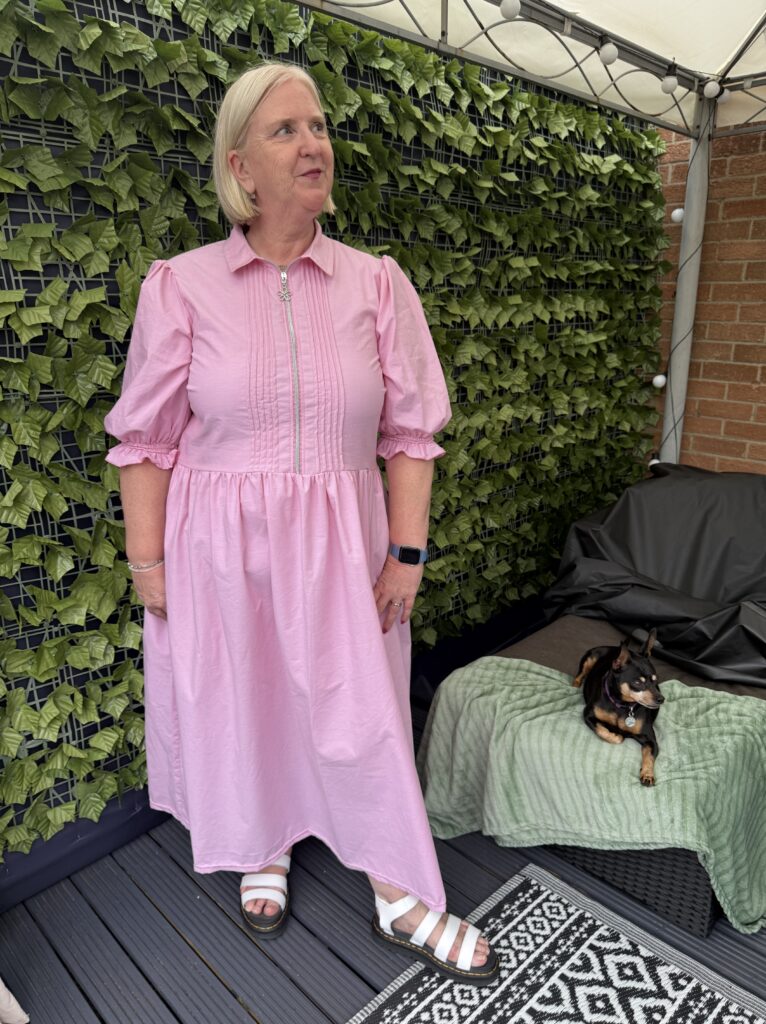
One of my favourite sewing patterns launched in the last year was The Aspen Dress from Fabric Godmother. I got the pattern immediately and made 2 classic versions in chambray and cotton poplin but I also had this lingering inner voice saying ‘I wonder how that will look with a pintuck hack’. In this make I added pintucks, gathering, shirring and rolled hems using my baby lock machines.
Here’s the link to my YouTube vlog on this dress if you would like to check it out
You are currently viewing a placeholder content from YouTube. To access the actual content, click the button below. Please note that doing so will share data with third-party providers.
I already own a baby lock Euphoria cover stitch machine, baby lock Acclaim and enlighten overlocker. I use them every time I sew and feel they speed up my threading, sewing and finished garment quality. I’ve been so lucky to have a baby lock Primo on loan for several months too – this machine just really elevates your sewing game with all the additional top cover stitch options. The Pintuck Foot is an optional purchase for both the Euphoria and Primo machines and is also available for the coverlock/combination machines too like the Aspire, Ovation and Gloria
Introduction:
I cut out the fabric several months ago – then a little procrastination set in. Does that happen to you too? I think I was concerned not with making the pintucks as that’s really easy to do, but more with how they would lie; especially the ones I was planning for the front bodice.
I’ve shared more details about this process on my YouTube channel.
PREPARING THE PATTERN/FABRIC
I chose a light weight pink chambray from Higgs and Higgs. It was more lightweight than I had hoped but has been perfect for the hot summer days. It holds a crease well and so was perfect for the pattern and the pintuck hack.
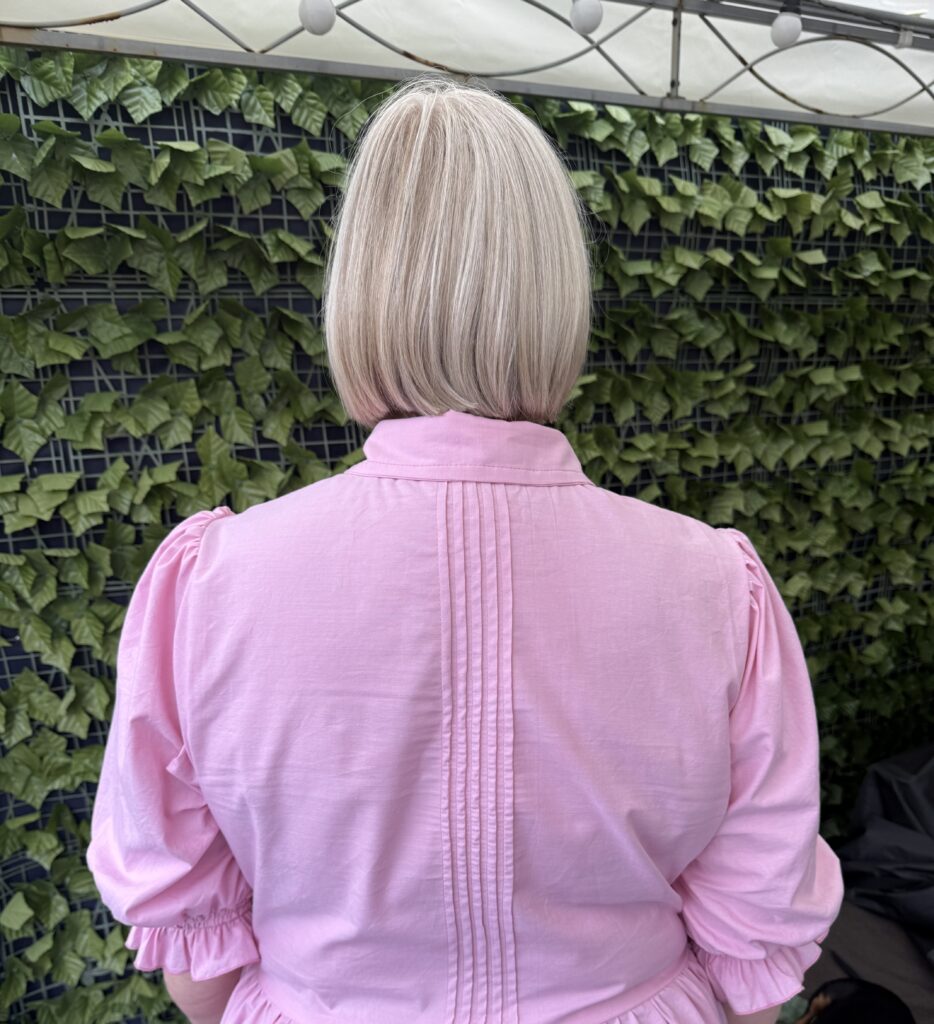
I chose to do the pintucks in the centre back panel, front bodice and sleeves. Though later I didn’t go ahead with the sleeves;
I do like the sleeve pattern from The Fleur Dress from Fabric Godmother which switches into the Aspen perfectly.
My initial thoughts were to do vertical pintucks from the bust darts and I cut some rough pattern shapes for this, I soon realised this was the wrong place.
I cut out larger than needed pieces approx. 30% for the front and back bodice.
For the back bodice I ironed in a central crease line and used this as my first pintuck line.
For the front bodice I started 2 inches away from the centre of the front (where the zip would be inserted,) again pressing a line on each piece.
For the sleeves I cut them both out and added 3 inches to the bottom of each sleeve.
Setting Up the Machine for Pintucks
This is very easy- I used the quick user guide set up for a wide coverstitch. Using needle positions C1 and C3 and air threading the looper. The machines have auto tension too so no need to adjust anything which is perfect.
I chose thread colours to complement the fabric, however, you could thread your needles with a bold thread for a more dramatic effect. You won’t see the looper thread on the finished garment if your fabric is opaque.
Change the foot to the Pintuck Foot and insert the adaptor into the front of the machine. As you are sewing the adaptor creates the pintuck as there is a groove in the base of the foot that the fabric goes through. Super easy!
I simply chained on and off at each end of the fabric and used the edge of the foot to follow the previous row.
I did 5 pintucks in the centre of the back and 5 on either side of the front bodice, I then pressed the pintucks in place.
At this point I decided to do something a little different with the sleeves.
I then laid on the bodice pattern pieces and cut them out and progressed with the pattern as normal. Once cut out I used fray check on the start and end of each row to prevent the stitching from unravelling.
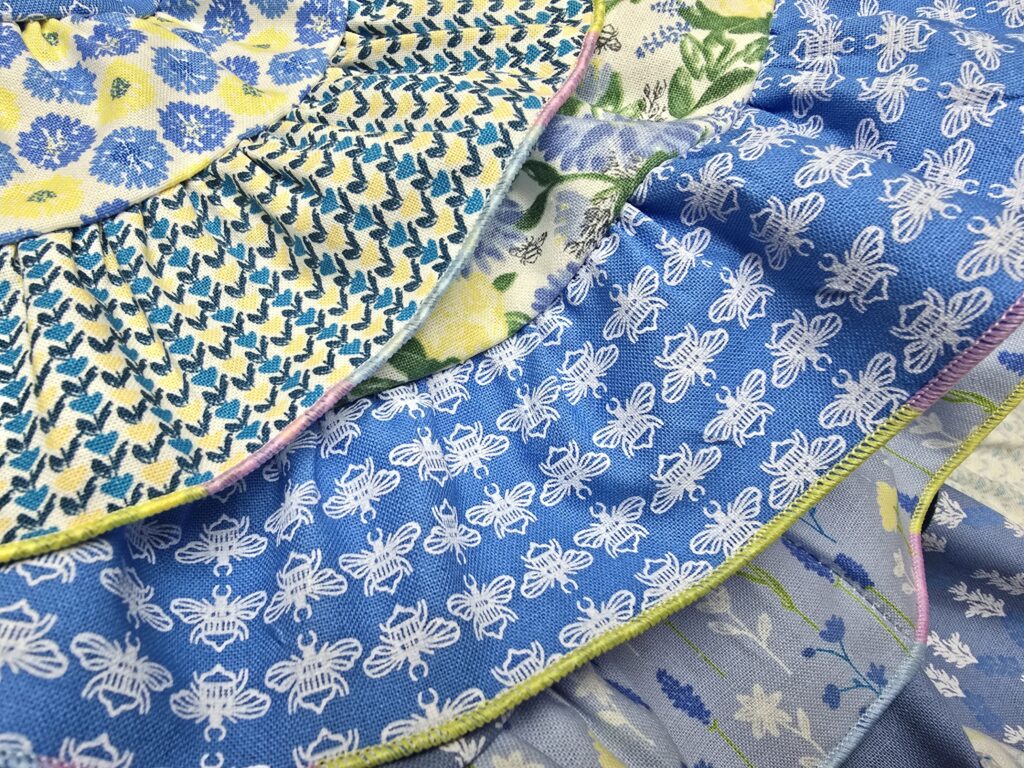
Gathering with the Overlocker
This is one of my favourite things to do. To gather I set the differential feed to 2 and stitch length to 4. I was using my baby lock Acclaim machine, which has air threading for both the needles and loopers, plus auto tension. No other adjustments were needed.
I joined the skirt pieces together and finished the seams as normal with the overlocker, then I used the gathering settings above and overlocked around the waist creating the gathers.
With the sleeve pieces I overlocked around all edges except the hemline. When reaching the gathering notches simply move the differential feed to 2 and return it to N at the next gathering notch.
Gathering Tips
1. If you need to increase the gather to fit the top, simply use a pin to lift the 2 needle threads from the chain and draw them up; this helps you to increase the gather much like you would if you had used your two lines of ease stitching on a sewing machine.
2. By adjusting the Differential Feed you can increase or decrease the volume of gathers; try 1.8 or 1.5 for less gathers.
3. You can also gather on a cover stitch machine in the same way, but you are unable to manually increase the gather as you can with the overlocker stitch.
Have a play on scrap fabric; I promise you will love it!
Adding some Shirring
I added 3 lines of shirring to the bottom of each sleeve starting approx. 1 inch from the hem using the normal foot. I did this using the cover stitch machine. Using needle C1 and shirring elastic in the looper; I bypassed the looper tension and used the threading wire to pull the elastic through. Using the edge of the foot as a guide, I followed the line of the previous row to create straight lines; chaining on and off the fabric at the start and finish of each row.
Hemming and a Rolled Hem
Once the garment was constructed I hemmed the dress using a wide cover stitch and hemmed each sleeve with a rolled hem – I absolutely love the rolled hem finish and it’s so easy to achieve on the baby lock machines: simply remove the left needle if still in; select stitch selector C or D; turn the stitch length dial to the rolled hem setting using a stitch length of your choice; I like 1, and then set your stitch width to the M; which is the standard setting for a rolled hem.
Have you tried sewing pintucks, shirring, or rolled hems yet? Let me know in the comments or tag me in your makes! 💬
Share
We have a great offer for you!
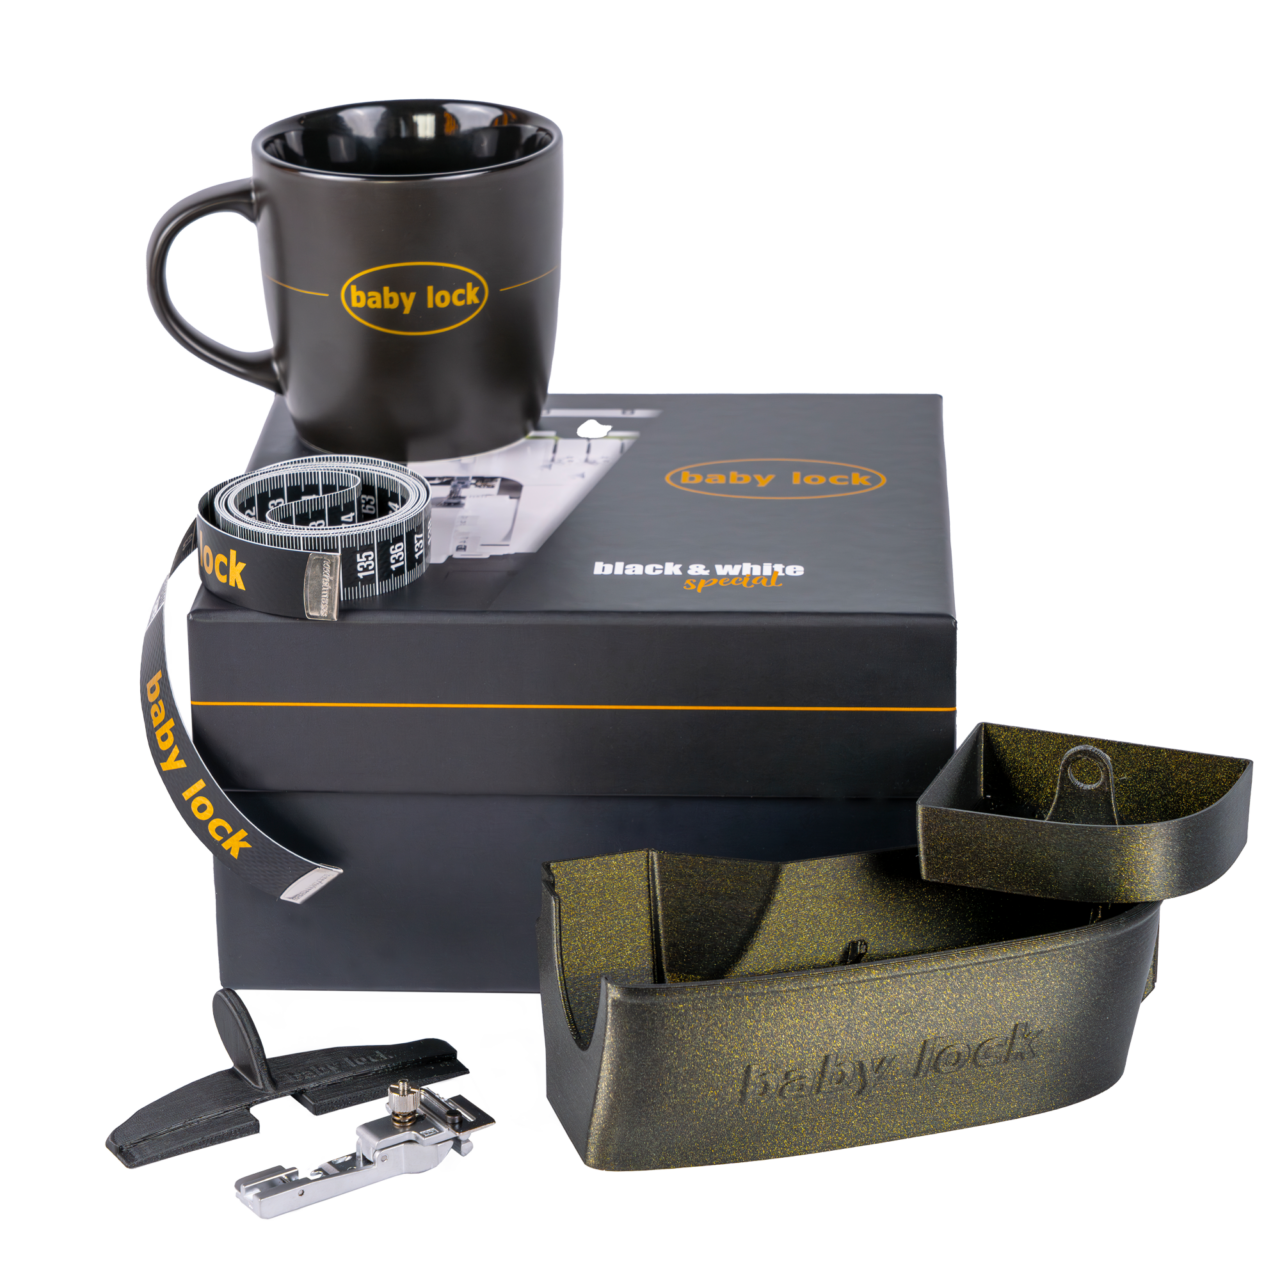
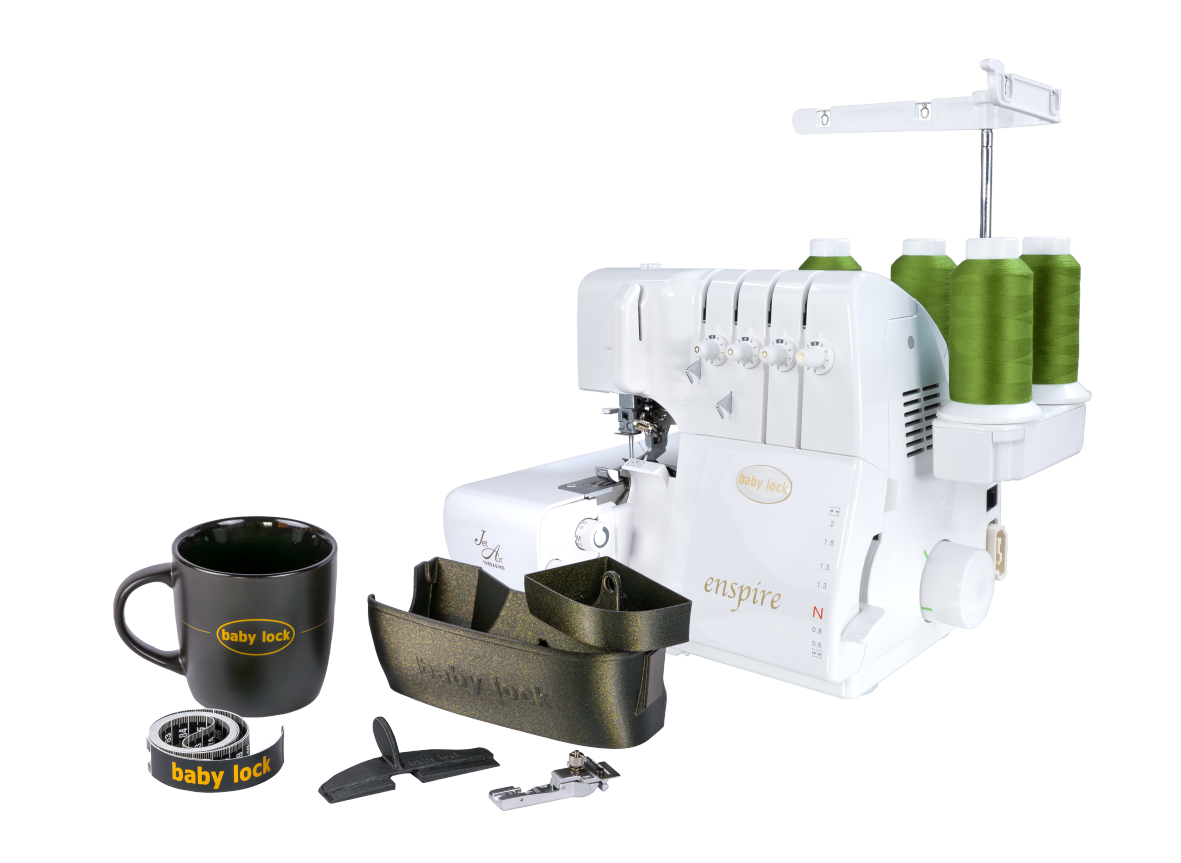
Our enspire – black & white special is now starting, where every purchase of an enspire Ovelock machine is rewarded with an exclusive free box.
The gift box is packed full of useful accessories and merchandise – and best of all, it’s completely free with the purchase of an enspire!
Please note: The edition is strictly limited. And only while stocks last.
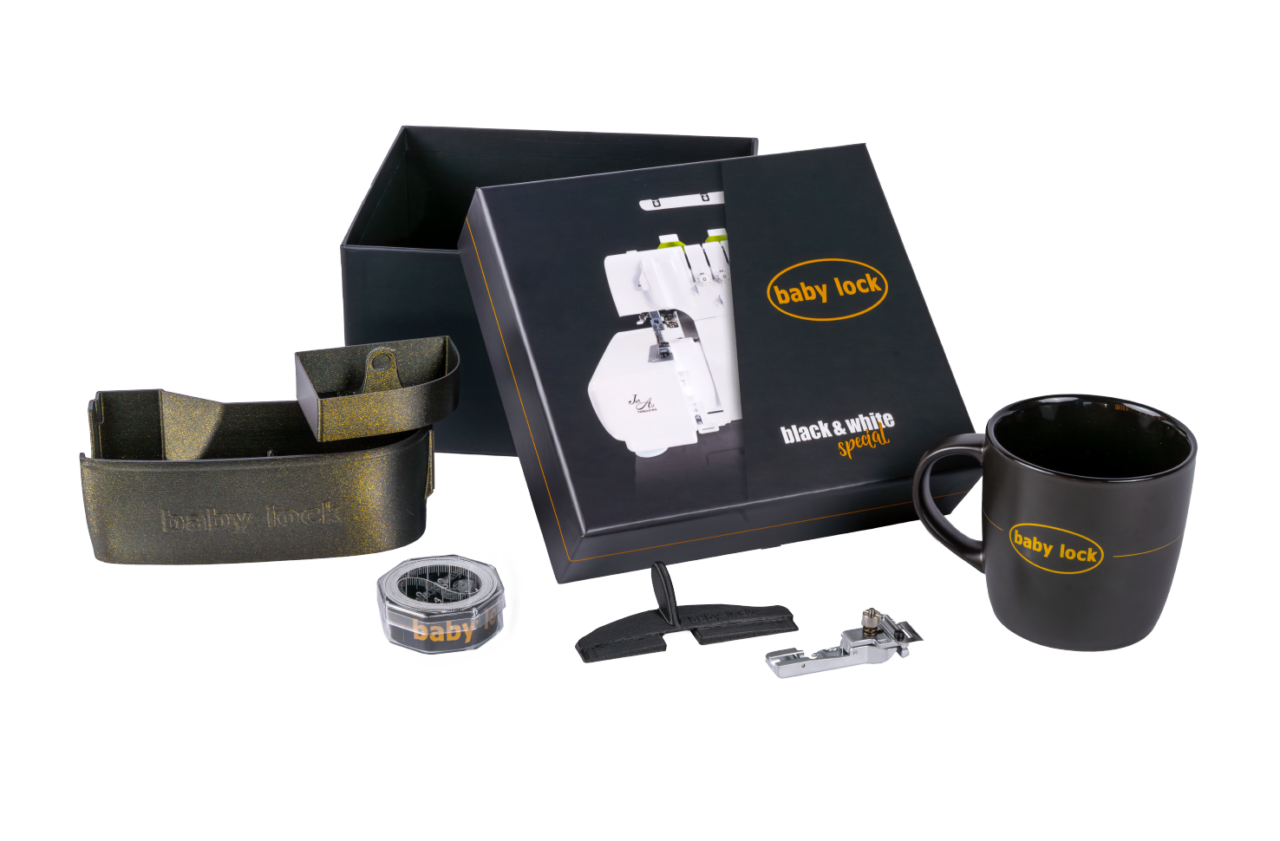
What’s inside the black & white box
A baby lock cup, perfect for a sewing break
A baby lock tape measure to ensure everything fits exactly
A practical trim bin in an exclusive special edition – only available in this box to keep the sewing area clean
A sewing bridge that makes sewing even easier
A elastic foot, ideal for various sewing techniques
The details:
Who receives the gift box? All customers who buy a baby lock enspire overlock machine.
How long is the offer valid? Until the end of September or while stocks last – so be quick!
Share
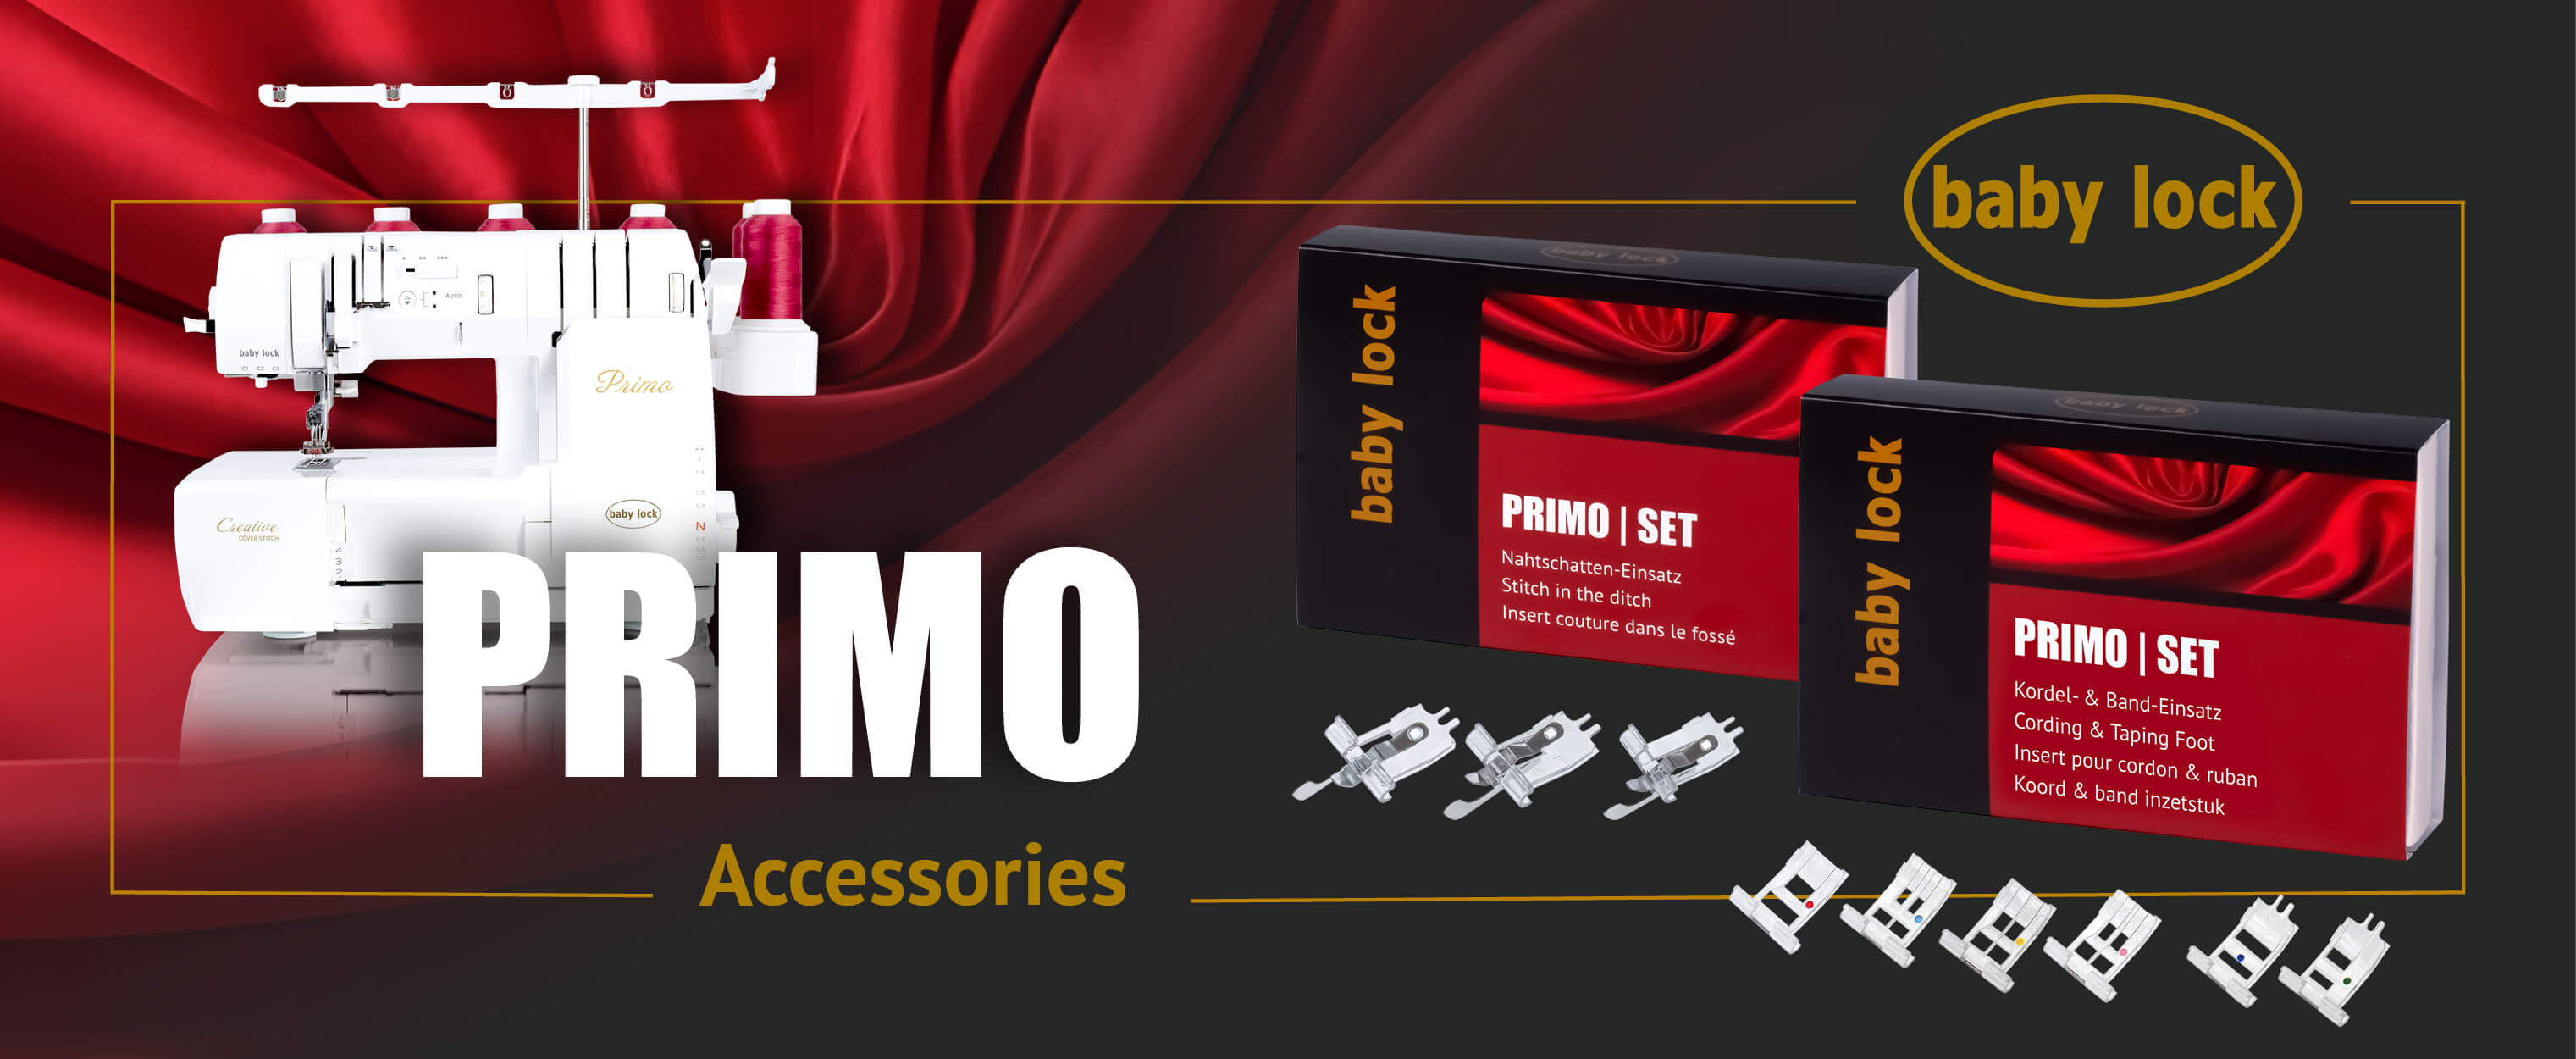
For the Primo Top coverstitch machine
We are now offering an extensive range of accessories for our Primo coverstitch machine. These accessories open up completely new creative possibilities for you and your customers. Together with the inserts and the tapes and cords that can be used with them, the use of different yarns in the thread layers of the swing foot offers you endless creative design possibilities.
Your customers can give free rein to their imagination and create individual designs.
Expand your creative sewing possibilities. With the Primo coverstitch machine, you have the option of sewing a wide variety of thread types onto your sewing projects. By using the new and different accessories for the pendulum foot, you have the option of stitching even better. The creative possibilities are endless.
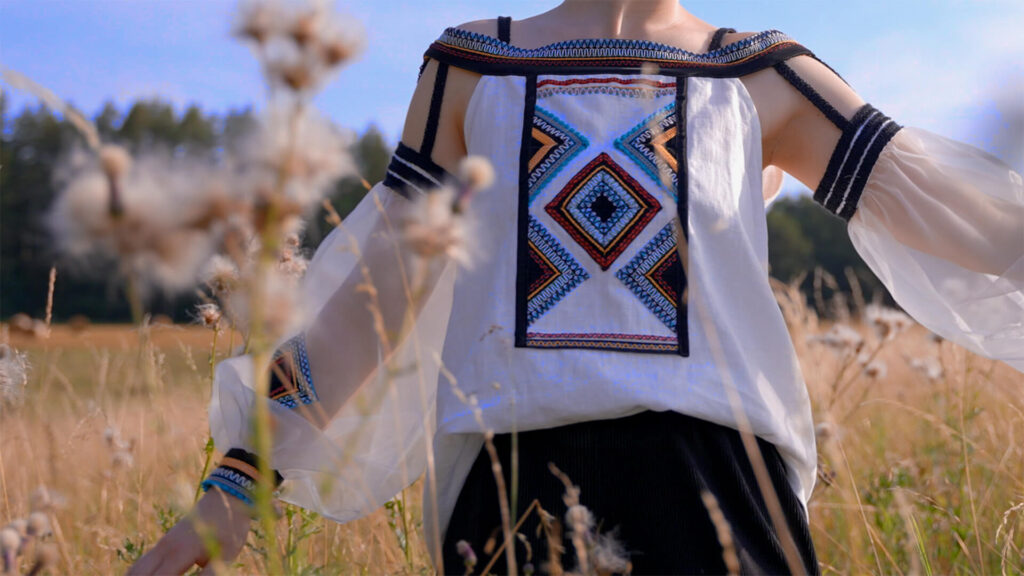
Draw your own patterns, create your own fabric design. Bring fabric patterns to life by using additional cords and ribbons to enhance the three-dimensional effect of the patterns.
With the Primo you can sew numerous different. threads. Even thick, wolly thread can be threaded and sewn through the wipers of the Primo top coverstitch machine. In combination with the various threads, cord, tapes and stitch in the ditch inserts, a new dimension of sewing is created. Get creative, try to rediscover yourself and dare to go beyond the limits of conventional sewing.
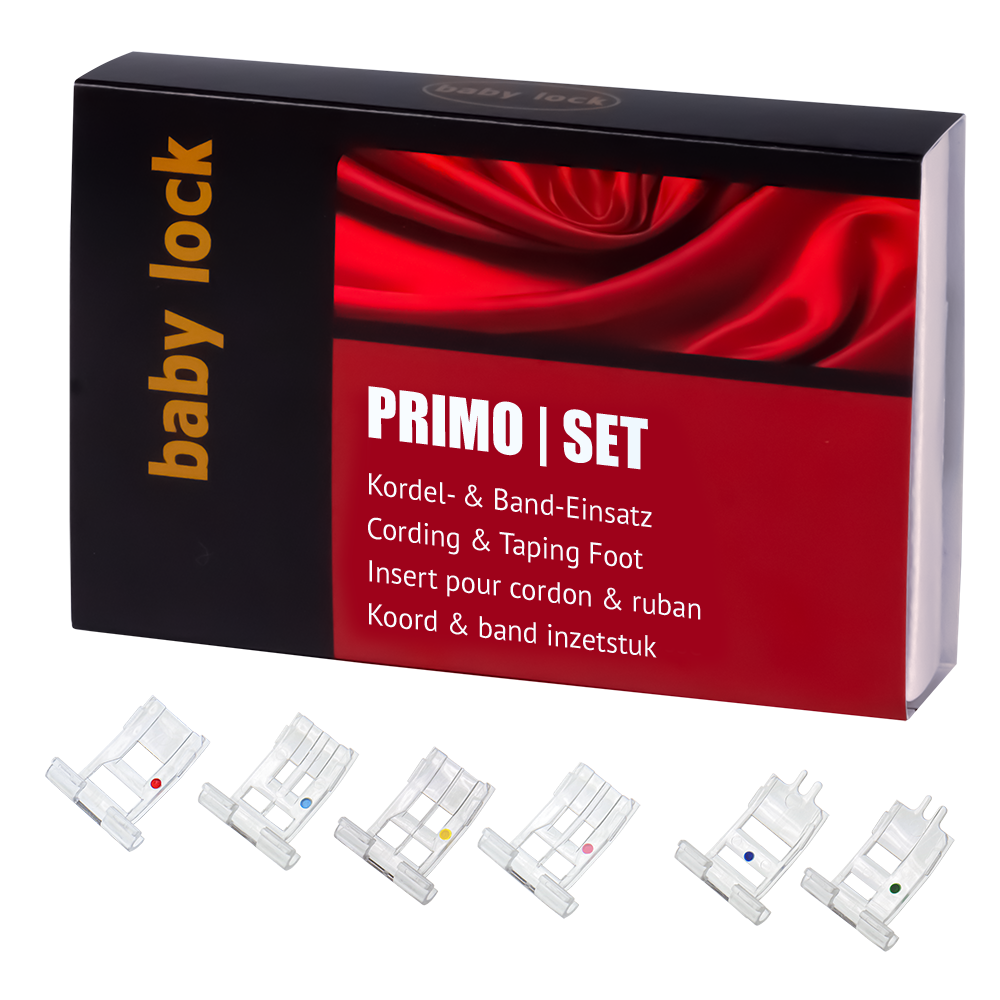
Inserts for Primo swing foot
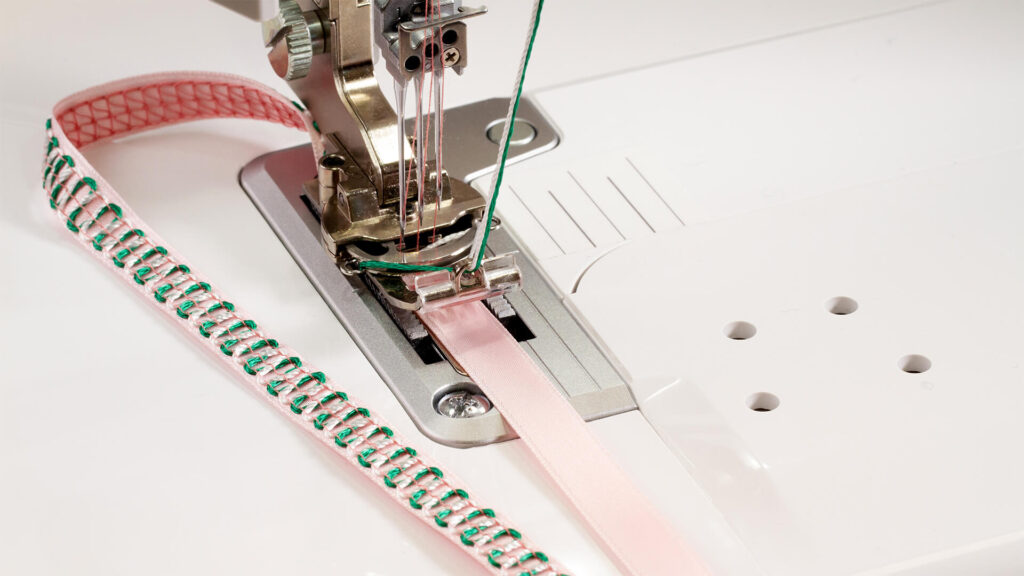
Cording and Taping feet: With these special inserts, various tapes and cords can be applied directly to fabric while sewing with the Creative Coverstitches. This enables precise and decorative embellishments in a single operation.
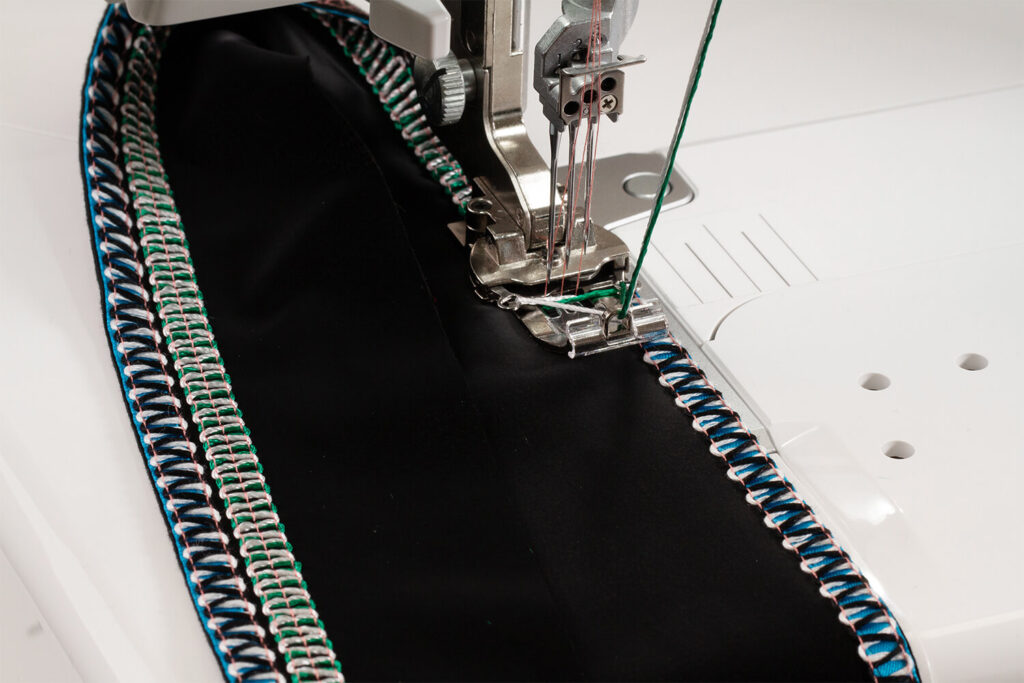
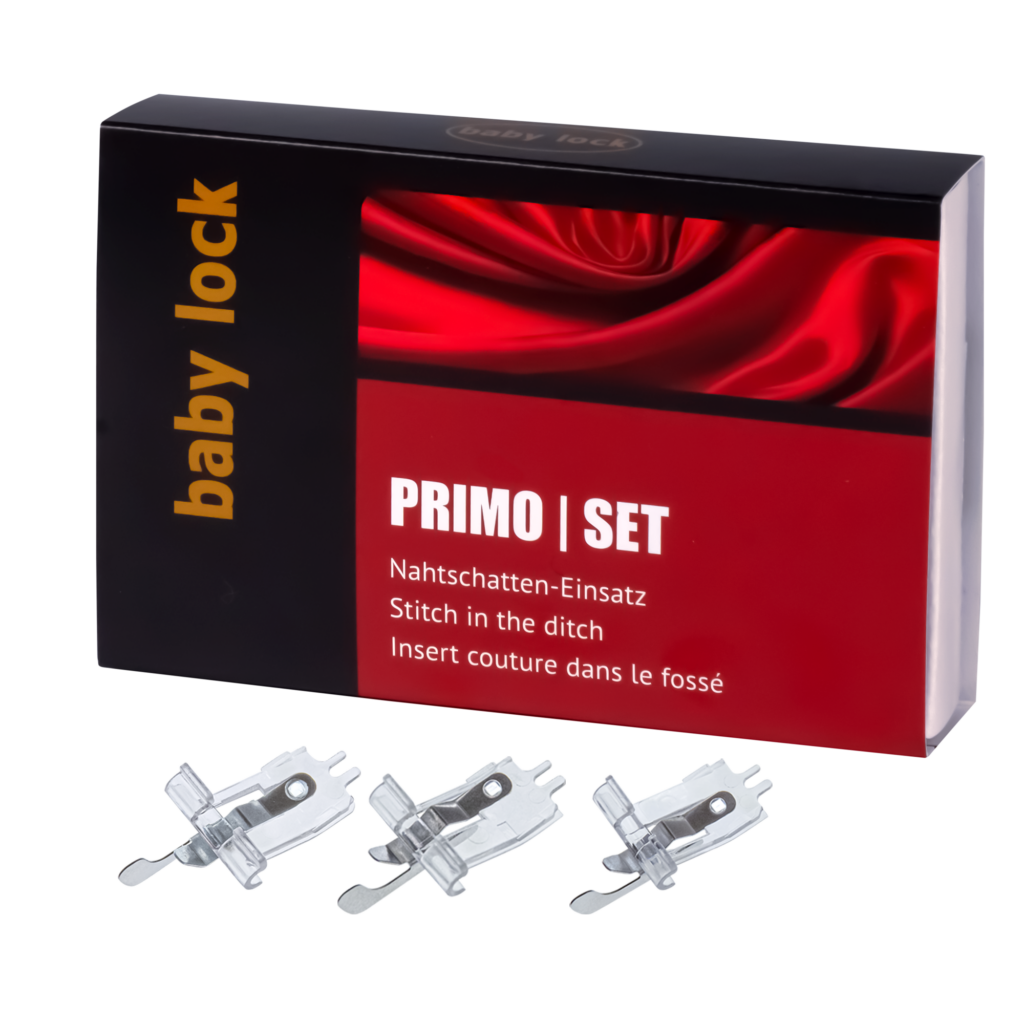
Stitch in the ditch: These inserts make it possible to decorate existing seams with swing or serpentine stitches. The stitches can either be placed to conceal the seam or exactly next to it to create unique effects.
In addition to the inserts for the swing foot, there are other new accessories for both the swing foot and the standard foot of the Primo.
Cord guide The cord guide in combination with the cording foot for the Primo swing foot creates a plastic, pintuck-like decorative look. The cords are guided under the fabric. The cord guide also prevents the cords from tangling.
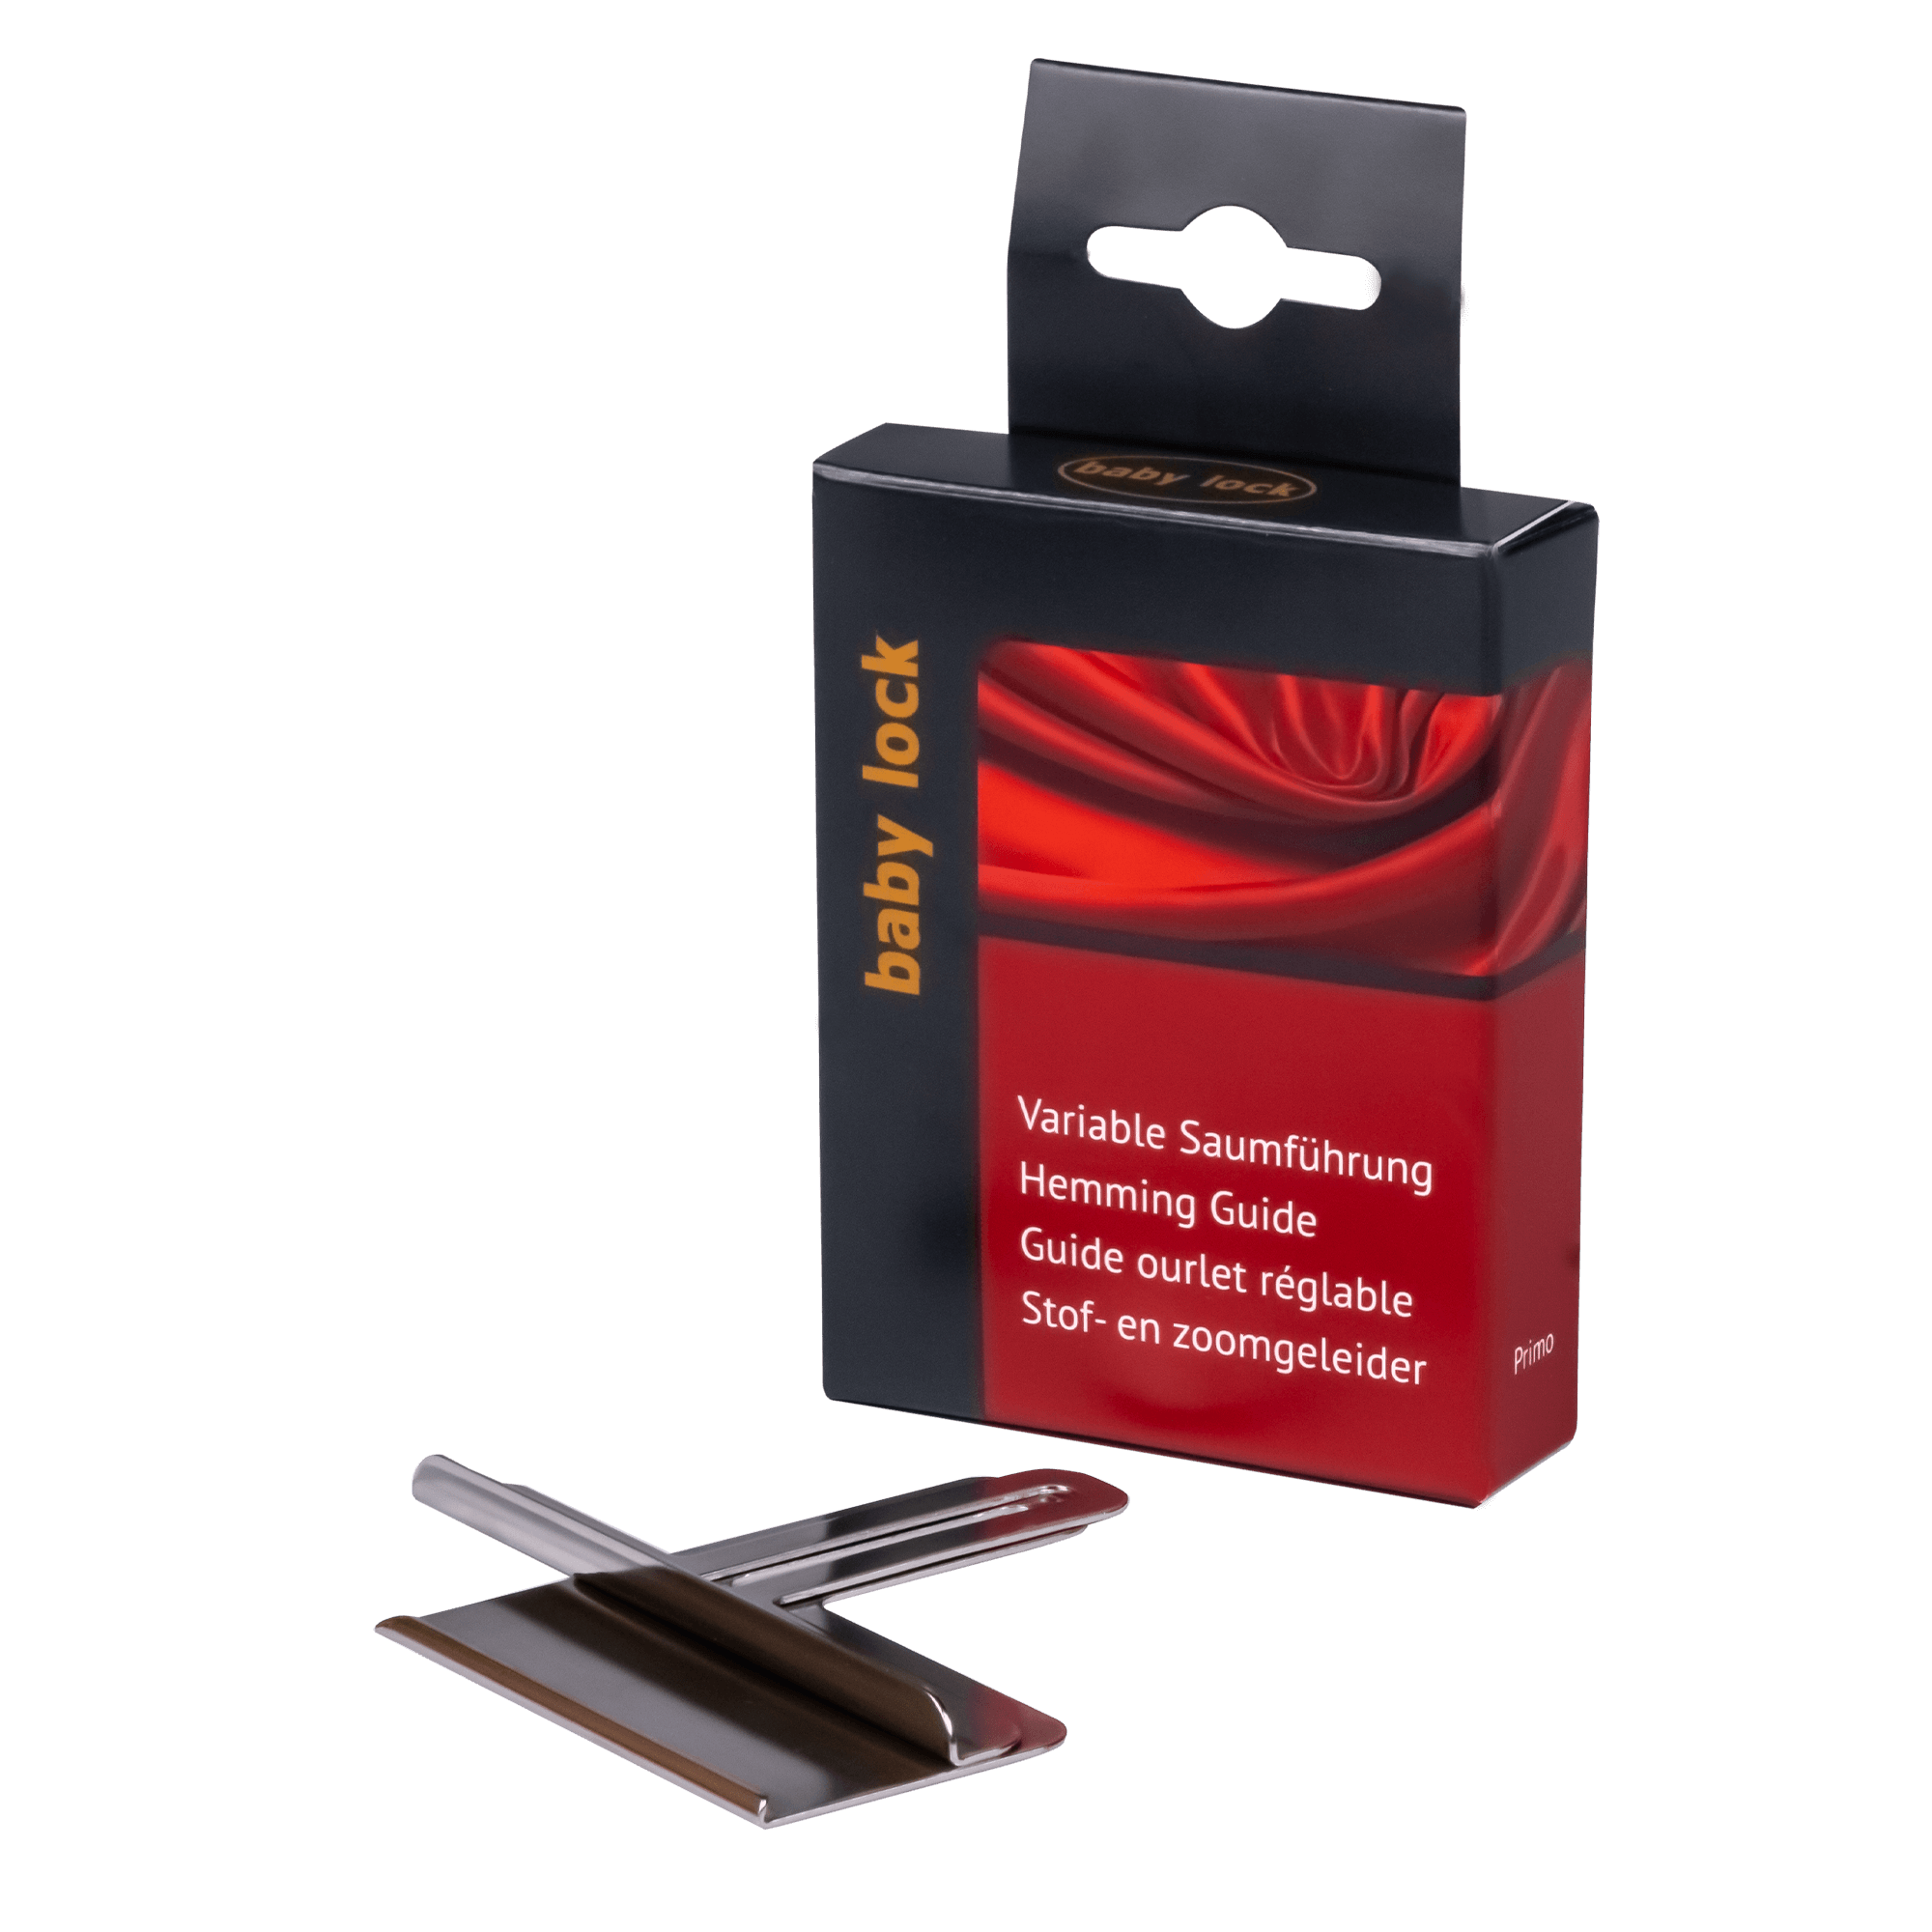
Hemming Guide Using the hemming guide enables precise and straight hemming as well as sewing in the round. This set is not recommended for sewing curves. The stop edge can be moved so that the stitching distance to the fabric edge can be variably adjusted – up to a maximum width of approx. 3.5 cm.
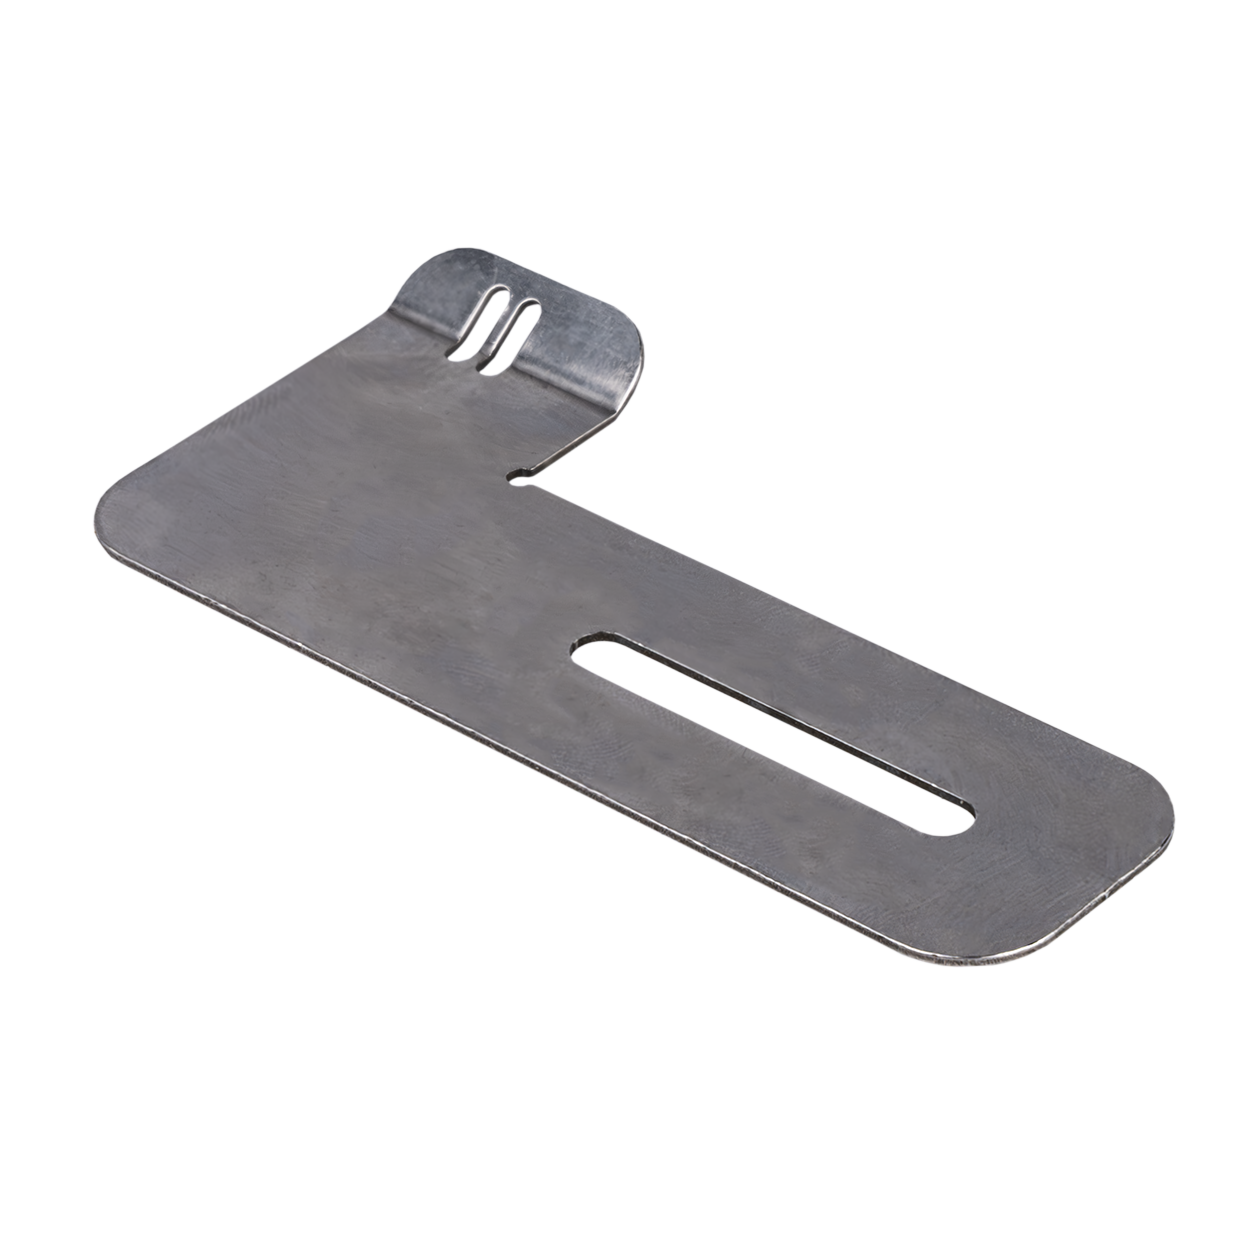
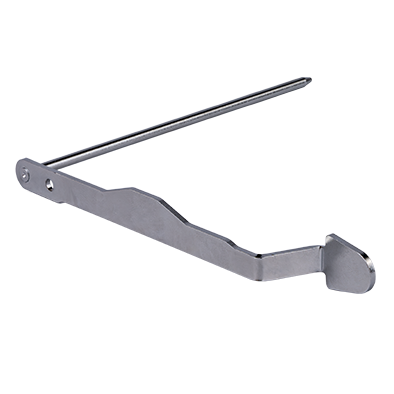
Quilting guide The quilting guide is a useful accessory for precise quilting work, especially in the stitch in the ditch The front part presses on the seam line like a finger and enables evenly spaced sewing. Whether between needle(s) and hem edge or individual decorative seams (max. width: approx. 7 cm from centre needle).
The baby lock Primo accessories are now available from all baby lock retailers.
You are currently viewing a placeholder content from Facebook. To access the actual content, click the button below. Please note that doing so will share data with third-party providers.
You are currently viewing a placeholder content from HubSpot. To access the actual content, click the button below. Please note that doing so will share data with third-party providers.
You are currently viewing a placeholder content from Hubspot Meetings. To access the actual content, click the button below. Please note that doing so will share data with third-party providers.
You are currently viewing a placeholder content from Instagram. To access the actual content, click the button below. Please note that doing so will share data with third-party providers.
You are currently viewing a placeholder content from X. To access the actual content, click the button below. Please note that doing so will share data with third-party providers.


Share