Sewing Stories & Advice with Jan❤️🪡
Hi, I’m Jan! With years of experience in the sewing world, I’m all about baby lock machines, clever hacks, and fun projects that make sewing a joy. Whether you’re new to stitching or have been at it for years, I’m here to inspire and share a few tips along the way.

Sewing holiday, unabridged!!
OK, I know that I work in the sewing industry.
Sad individual that I am (or maybe LUCKY), I happen to love going on sewing holiday with my sewing buddies!
Around 10 of us like to rent a large house twice a year, laydees of a certain age prefer a room to themselves, plus, if poss, a bathroom! This makes it quite difficult to find just the right venue. However, this spring’s choice was a repeat, situated in Shropshire, and well known to us. We have a rota for cooking meals, one for desserts, and always a willing volunteer at gin o’clock…..usually 4.30; depending on whether projects have gone well, or failed miserably!
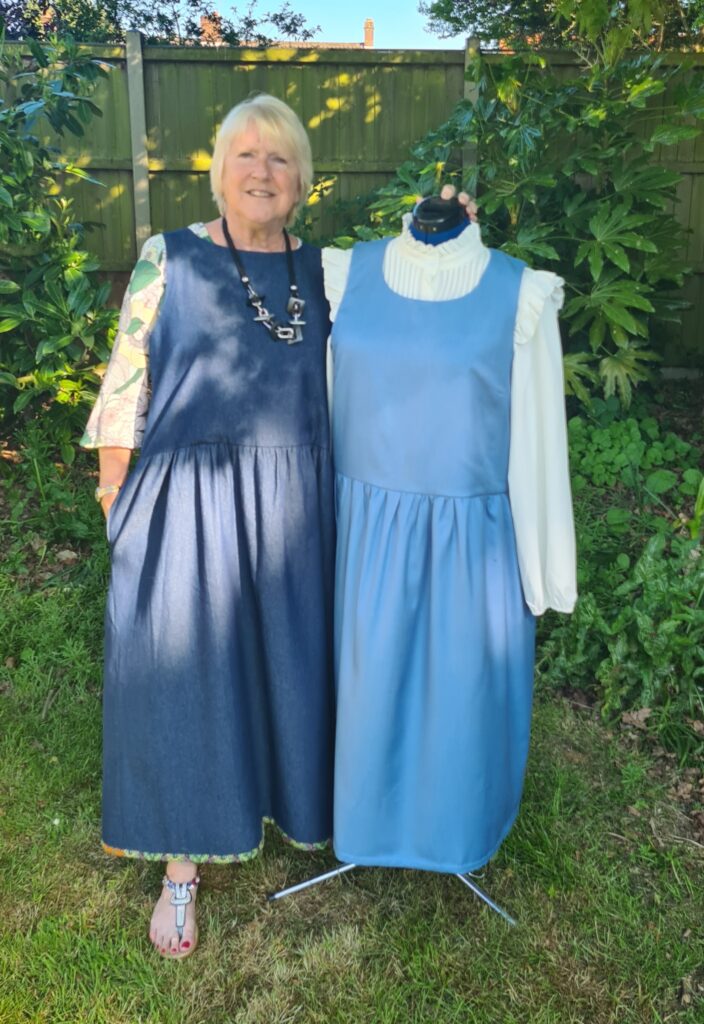
My remit for the week (Having first discarded most of the TEN projects that I initially selected), was to produce a pinafore dress, as this was a garment that I didn’t possess. I found a great pattern from Tessuti; the Felicia Pinafore Dress. To this end, I was to use the beyootiful cashmere and wool mix that I had been saving for ‘best’.
Anyone else do what I do? Buy some gorgeous fabric, then not use it due to shortage of time, failure to make a toile, or sheer fear! Because I had a whole seven days, I felt confident that I could do a toile and the ‘real thing’. My stash is swelling with the good stuff, while cheap fabrics for toiles are disappearing fast. (I never use calico, as I wouldn’t wear it. I prefer to use a similar fabric to that planned)
First inspection of the pattern showed rather a lot of facings and interfacings. Couldn’t be bothered with that, so I decided to make TWO bodices, and do the dreaded ‘bagging out’; only to discover that I didn’t have sufficient of my cheap denim for that. One of the lovely ladies came to my rescue, with an exciting bin bag of ‘excess material’(!!!). I chose a gorgeous busy cotton in bright colours.
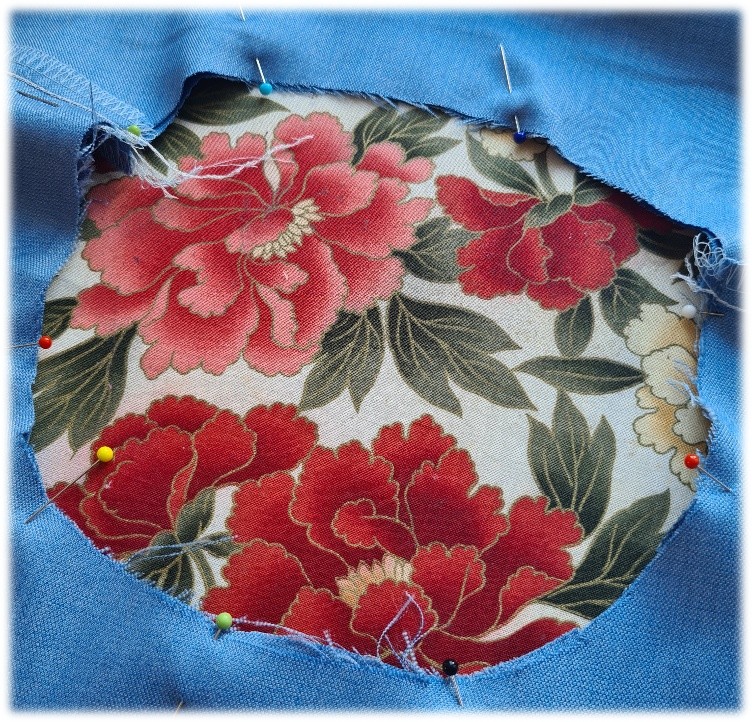
My weapon of choice was the baby lock Evolution. Now discontinued, it is a similar size to the new Aspire, and weighs less than the Ovation or Gloria for travel. It has the option of the industry favourite stitch; the 5 thread safety seam. As I would be using woven fabrics for both toile and the real thing, this was a good strong choice. My trusty Pfaff Performance 5.2 was there for the extras.
So, denim and donated cotton cut, darts stitched, I joined both shoulder seams. (All pictures show the good fabric!)
Next was to join the lining and main layers at the neckline. Then trick to doing this with two different fabrics is to put the lightest one underneath, as your feed dogs will generally keep it under control. Even when using an overlock and chain stitch, it is still necessary to snip the seams; enabling the seam to spread once turned the right way out. Just remember not to snip beyond the last line of stitching!!!!
SNIPS OR NOTCHES? Snips when you’re sewing the inside of a circle to turn outwards. Notches if you sew the OUTSIDE of a circle to turn inwards!
Now for the fun part…..BAGGING OUT! This requires a degree of common sense which, apparently, I don’t possess. I knew the theory, I’d done it before. Firstly, the armholes: main fabric joined to lining fabric, right sides together. Sounds logical and straightforward, doesn’t it? Not on that day, and I promise no G&T had passed my lips!
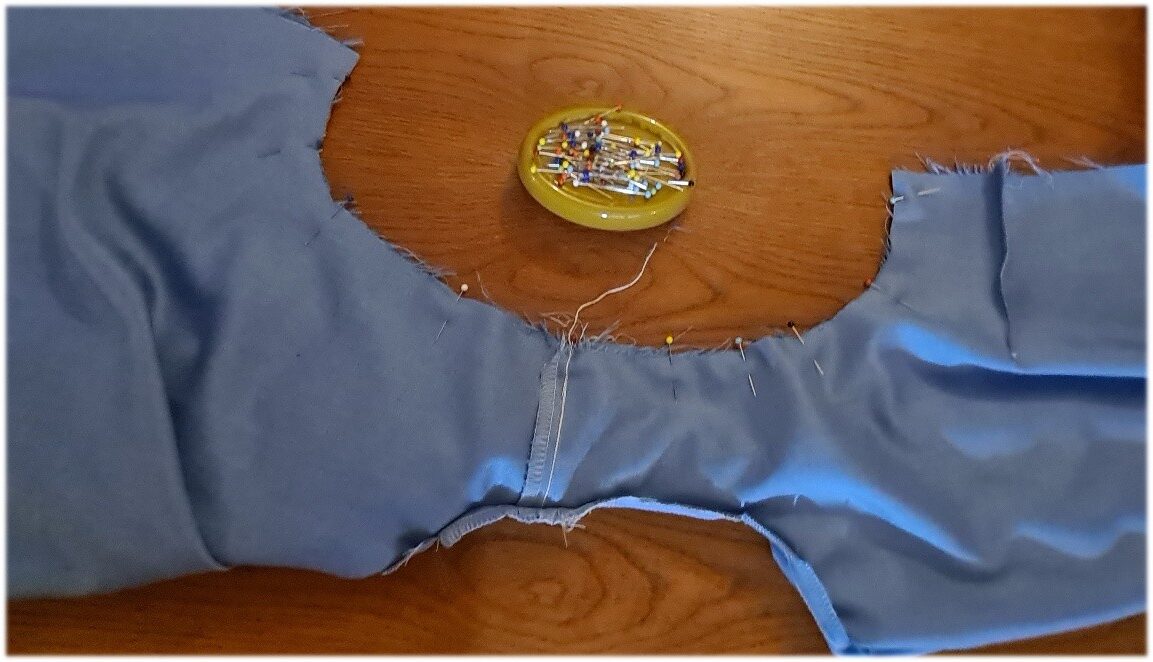
First, I made a sausage. For some inexplicable reason, I joined both main fabrics, thereby totally closing the armhole.
A fair amount of hysterics ensued, with a few eager volunteers arriving to also scratch their heads in puzzlement. We twisted and turned it, poked and prodded. The committee vote was to baste first, which I then did after giving myself a damn good talking to……..
Corrected technique shown in the photo. The opposite side is rolled and inside; between armhole and neckline.
Simples!!!
I believe this was the day that gin o’clock arrived early…..🍸🍸🍸🍸
Once the devil’s armholes were completed, the rest was simple in comparison. Side seams as pictured, showing the chain stitch for strength alongside the 3 thread overlock for a beautifully neat finish.
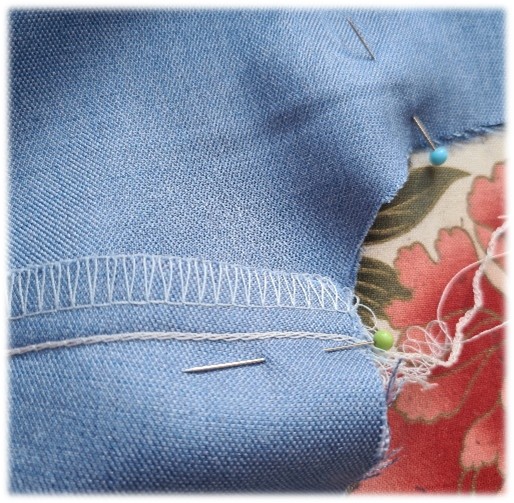
NOTE: I found that using needle C1 plus a wide overlock gave me a 5/8” seam.
ANOTHER NOTE: I have recently seen posts about chain stitch unravelling. Do not EVER turn the balance wheel backwards, and your cover stitch or chain stitch will not unravel!
Skirt Sewing & Construction!
Next came the skirt…pockets first, stitched onto each side, under stitched on the sewing machine, then join the side skirt seams including pockets.
NOTE: Over the years, several people have complained to me that when stitching such a seam with pockets, their steering has slipped, resulting in an accidental slice into the fabric. DO NOT STITCH FROM TOP TO BOTTOM! Start at the hemline. Any (gin and tonic induced?) slippage will occur in the pocket, not into the skirt!
Now, those of us who proudly own a quality overlocker or combination machine have the ability to gather fabric evenly using the fabulously misunderstood Differential Feed. In this instance, I measured the bodice, and the skirt widths, discovering that the skirt was roughly 1.5 times bigger than the bodice. I tested a 10” strip of the main fabric, with settings at DF 1.5 and stitch length 4. This test drive came out just as I wanted: my 10” strip was 6.5”… almost exactly 2/3 of the original.
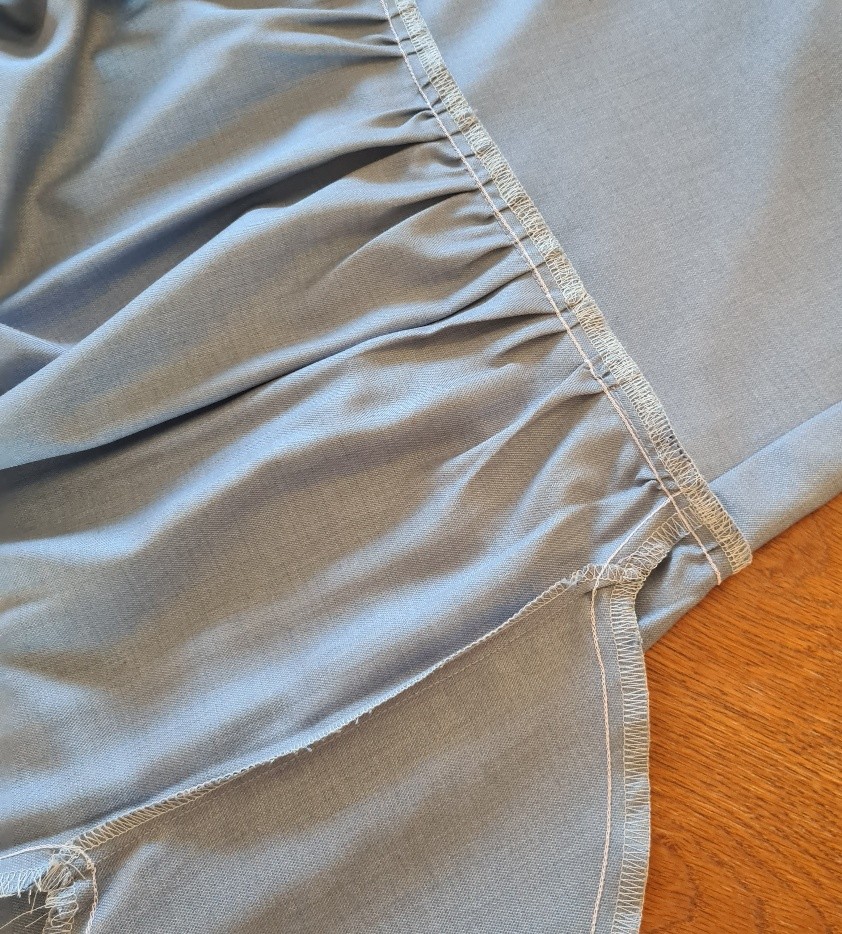
NOTE; NEVER assume that you’ll get the result you want. Every fabric will behave differently. Always do a test run!
When gathering a skirt to a bodice, each one of which is a complete circle, be sure to leave an overlock chain at each end. Then, if your fit isn’t quite accurate, you can pull the needle threads to gather a bit more.
NOTE: overlock stitches are waaaaaayyyy easier to gather than those on a sewing machine! I use a 4 thread overlock stitch to achieve ease stitching at the top of a sleeve head. Beats snapping the lockstitch thread repeatedly, without having to resort to the dreaded hand sewing!
Because the pale blue fabric was such a luxury, I opted for a hand sewn hem!!!!!
Anyone who knows me, will understand that actually sewing things with one of them there little sharp things is a bit of a no-no! However, I dutifully gave it my all; together with a fingerful of blood and some choice words. You won’t see photos of that, though. It wasn’t my best achievement!
All things considered, I think I will get a lot of mileage from these two dresses. I’m at an age where I repeatedly need to remind myself that the days of a bare midriff, pencil skirt, hot pants (some of you won’t have a clue what they are!) or, in modern parlance, bodycon, are long gone….as is my size 8 body.
I’m at that stage that I can – and will – wear anything I darn well please without fear of side eye glances; and it’s wonderful!
Till next time,
Keep calm and keep stitching,
Jan 😄✂️🪡

Share